Uncategorized
AI Models Don’t “Think.” They Predict.

AI Models Don’t “Think.” They Predict.
The single most important thing to understand: a large language model is a prediction engine. It reads your entire prompt, then predicts the next word (technically, the next “token”) based on statistical patterns from its training data. Then it predicts the next word after that. And the next. One at a time, until it builds a full response.
It does not plan ahead. It does not understand your intent. It does not “know” anything. It recognizes patterns and predicts what text is most likely to follow the text you gave it.
This has a profound implication: the quality of the prediction is entirely determined by the quality of the input. Better input patterns produce better output patterns. That’s the whole game.
Every effective prompting technique — including KERNEL — works because it gives the prediction engine a higher-quality input pattern to work from.

Why “Simple” Is the Wrong Frame
The KERNEL framework starts with “Keep it simple” — suggesting that shorter prompts with less context produce better results. And for basic code tasks, that’s often true.
But the underlying principle isn’t simplicity. It’s signal-to-noise ratio.
Language models use something called an attention mechanism — a system that decides which parts of your prompt to focus on when generating each word. When your prompt is full of irrelevant context, the attention mechanism gets diluted. The model pays attention to everything equally, including the noise, and the output quality degrades.
This is why a 500-word prompt full of background rambling produces worse results than a 50-word focused prompt. But it’s also why a 500-word prompt that’s well-structured — with clear sections, labeled data, and the task at the end — can dramatically outperform the short version for complex tasks.
The “Lost in the Middle” Problem
There’s a well-documented phenomenon in language model research: performance drops by up to 30% when critical information is placed in the middle of a long prompt, compared to placing it at the beginning or the end.
The model’s attention is strongest at the start and end of your input. The middle gets less focus — it’s the cognitive equivalent of someone’s eyes glazing over during a long meeting.
This explains why the KERNEL framework’s “Logical structure” rule works so well. When you put your context first and your task last, you’re placing information exactly where the attention mechanism is strongest:
| Position | What to Place Here | Why |
|---|---|---|
| Beginning | Background data, documents, context | Strong attention. Gets processed and retained. |
| Middle | Examples, rules, formatting guidance | Weakest attention. Keep this structured and labeled. |
| End (last line) | Your specific task or question | Strongest attention. The model generates its response from here. |
This is the theoretical basis for why structured prompt frameworks (like the Bento-Box method) consistently outperform unstructured prompts — even when they contain the same information.
Why Positive Instructions Beat Negative Constraints
The KERNEL framework recommends telling AI “what NOT to do.” This is one area where the empirical advice conflicts with the research.
Both Anthropic and OpenAI’s documentation specifically recommend positive framing over negative constraints. Here’s why it matters at the model level:
When you write “don’t use external libraries,” the model has to process the concept of external libraries, recognize it as something to avoid, and then navigate around it. But the prediction engine doesn’t have a clean “avoidance” mechanism — it processes the concept either way, and the mere presence of “external libraries” in the prompt can increase the probability of those tokens appearing in the output.
❌ Negative framing
“No external libraries. No functions over 20 lines. Don’t use global variables.”
✅ Positive framing
“Use only Python standard library. Keep each function under 20 lines. Use local variables with descriptive names.”
Same constraints. Different framing. The positive version gives the model a clear target pattern to follow, rather than a pattern to avoid.
Why Examples Work Better Than Descriptions
The KERNEL framework doesn’t explicitly cover few-shot prompting (providing examples), but this is one of the most powerful techniques available — and the theory explains why.
When you describe what you want (“write professional, concise emails”), the model has to interpret those adjectives and map them to a style. That interpretation is fuzzy. “Professional” means different things in different contexts.
When you show what you want (by providing 3–5 examples of the input-output pattern), you’re giving the model a concrete statistical pattern to match. It doesn’t have to interpret anything — it just extends the pattern you’ve established.
The Temperature Variable Most People Miss
Every prompt framework focuses on the words you write — but there’s a hidden variable most people never adjust: temperature.
Temperature controls how the model navigates its probability list when choosing each word. At temperature 0.0, it always picks the highest-probability word (deterministic, consistent, factual). At temperature 1.0, it samples more broadly from the distribution (creative, varied, surprising).
This is why the same prompt can produce wildly different results on different days — and why KERNEL’s “Reproducible results” principle is harder to achieve than it sounds. If you’re using a web chat interface, the temperature is set for you by the platform. But if you have access to settings or are using an API, matching the temperature to the task type is one of the highest-leverage adjustments you can make.
| Task Type | Ideal Temperature | Why |
|---|---|---|
| Code, math, data extraction | 0.0 – 0.2 | One correct answer. No creativity needed. |
| Business writing, emails | 0.5 – 0.7 | Professional but not robotic. |
| Brainstorming, creative writing | 0.8 – 1.0 | Many possible good answers. Variety is the goal. |
Where Frameworks Like KERNEL Fall Short
To be clear: KERNEL is a good framework. If you’re a developer writing code prompts, following it will improve your results significantly.
But it has three limitations worth noting:
1. It’s code-focused. The examples are all about scripts and data processing. Most people using AI aren’t writing code — they’re writing emails, creating content, analyzing data, learning new topics, making decisions. The principles are similar, but the application looks very different.
2. It doesn’t cover multi-turn interaction. One of the most powerful prompting techniques available in web chat interfaces is using follow-up messages to iteratively refine output. Most beginners treat their first prompt as the final product. In practice, the conversation is the prompt.
3. It’s model-agnostic by design — but models aren’t interchangeable. Claude handles XML-structured prompts better than any other model. GPT’s Structured Outputs can guarantee 100% JSON schema compliance. Gemini can process 2 million tokens of context at once. Knowing these model-specific strengths lets you choose the right tool for the job.
The Practical Version
Understanding why prompts work is useful. But what most people actually need is a set of practical, actionable best practices they can apply immediately — across any model, any task, any experience level.
I put together a comprehensive breakdown of the techniques that consistently produce better AI output, with before/after examples, decision frameworks, and ready-to-use patterns:
→ AI Prompt Engineering Best Practices: The Complete Guide
It covers the 5-Part Prompt Formula, the three core techniques (Zero-Shot, Few-Shot, Chain-of-Thought), when to use each one, the most common mistakes, and model-specific tips for ChatGPT, Claude, and Gemini.
If you found the theoretical breakdown here useful, that post is the practical playbook.
AI Prompt Engineering Best Practices

Want The Full Guide?
AI prompt engineering best practices aren’t about memorizing magic phrases or gaming the system. They’re a set of simple, repeatable principles that help you get dramatically better results from any AI tool — whether you use ChatGPT, Claude, Gemini, Copilot, or anything else.
The problem? Most people are still prompting the way they did in 2023. Short, vague requests. No structure. No context. And they’re wondering why the AI keeps giving them generic, surface-level answers.
This guide breaks down exactly what works in 2026 — from foundational concepts to advanced techniques — so you can stop guessing and start getting output that’s actually useful.
What Is Prompt Engineering (And Why Should You Care)?
Prompt engineering is the process of designing clear, structured inputs that guide an AI model toward accurate, useful output. That’s it. No computer science degree required.
Here’s why it matters: the quality of what you get from AI is almost entirely determined by the quality of what you put in. The model’s intelligence isn’t the bottleneck — your instructions are.
Think of AI as a brilliant new hire. They’ve read every book and article ever written, but they know absolutely nothing about your specific project, your preferences, or your audience. If you tell that new hire “fix the code,” they’ll fail. If you tell them “Review this Python 3.11 function for bugs. It should accept a list of integers and return the sum of even numbers only. Follow PEP 8 conventions” — now they can deliver.
That gap between vague and specific is the entire game of prompt engineering.
The 7 AI Prompt Engineering Best Practices That Actually Work
These aren’t theoretical. These are the principles that consistently produce better output across every major AI model.
1. Be Specific — Ruthlessly Specific
The #1 reason people get bad AI output is vagueness. Every detail you leave out is a detail the AI has to guess — and it will guess wrong.
❌ Weak Prompt“Write me a blog post about marketing.”
✅ Strong Prompt“Write an 800-word blog post about email marketing strategies for e-commerce stores with under $50K/month in revenue. Target audience: solo founders. Tone: practical and conversational. Include 3 actionable tips with real-world examples.”
The strong prompt specifies the topic, length, audience, tone, structure, and what “good” looks like. The AI doesn’t have to guess any of it.
2. Assign a Role
Starting your prompt with “You are a…” is one of the simplest and most effective upgrades you can make. It frames the entire response through a specific lens of expertise.
- Need a workout plan? → “You are a certified personal trainer.”
- Writing a cover letter? → “You are a hiring manager at a Fortune 500 company.”
- Explaining something complex? → “You are a patient middle school teacher.”
- Debugging code? → “You are a senior Python developer doing a code review.”
This single line changes the vocabulary, depth, and perspective of the entire response.
3. Tell the AI What TO Do, Not What NOT to Do
This is one of the most well-documented findings in prompt engineering research: AI models respond much better to positive instructions than negative constraints.
❌ Negative Framing“Don’t use jargon. Don’t make it too long. Don’t include irrelevant details.”
✅ Positive Framing“Use simple, everyday language. Keep the response under 200 words. Focus only on the three main benefits.”
Negative instructions can actually increase the chance the AI does the thing you’re trying to prevent. Positive framing gives it a clear target to aim for.
4. Use the 5-Part Prompt Formula
For any important prompt, run through this checklist:
| # | Component | What It Does | Example |
|---|---|---|---|
| 1 | Role | Tells the AI who to be | “You are an experienced email copywriter.” |
| 2 | Context | Background the AI needs | “Our company sells eco-friendly products to women 25–40.” |
| 3 | Task | Exactly what you want done | “Write 5 email subject lines for our spring sale.” |
| 4 | Format | Shape of the output | “Keep each under 50 characters.” |
| 5 | Constraints | Rules or boundaries | “No clickbait. No ALL CAPS.” |
You don’t need all five for simple questions. But when the AI keeps giving you something generic or off-target, check which component you’re missing — that’s usually the fix.
5. Show Examples (Few-Shot Prompting)
If you need the output in a very specific format, tone, or style, the most effective technique is to show the AI what good looks like. This is called few-shot prompting, and 3–5 examples is the sweet spot.
✅ Few-Shot ExampleClassify these customer messages by sentiment:
Input: “Love this product! Best purchase ever.” → Output: Positive
Input: “Arrived broken. Very disappointed.” → Output: Negative
Input: “It’s okay, nothing special.” → Output: Neutral
Now classify this:
Input: “Shipping was slow but the quality is great.”
The AI learns the pattern from your examples and applies it consistently. This is especially powerful for classification, formatting, and maintaining a consistent brand voice.
6. Make the AI Show Its Work (Chain-of-Thought)
For any task involving math, logic, analysis, or multi-step reasoning, adding one simple phrase dramatically improves accuracy: “Let’s think step by step.”
This forces the AI to generate intermediate reasoning steps instead of jumping straight to an answer — and each step gives the next step better context. It’s called Chain-of-Thought prompting, and it’s one of the most well-researched techniques in the field.
For even better results, you can tell the AI exactly what steps to follow:
1. Describe what the code is supposed to do.
2. Walk through the logic line by line.
3. Identify edge cases that aren’t handled.
4. List each bug with the line number.
5. Provide the corrected code.”
Heads up: Chain-of-Thought generates more text (the reasoning steps), which means it uses more tokens and is slightly slower. Use it when accuracy matters — not for simple questions where a direct answer works fine.
7. Use Follow-Up Messages to Refine
This is the technique most beginners miss entirely: the conversation itself is a prompt engineering tool.
You don’t have to nail everything in one message. The AI remembers the full conversation, so you can start broad and refine:
| Message | What You Say |
|---|---|
| 1st | “Write a product description for a stainless steel water bottle.” |
| 2nd | “Make it more casual and fun. Target audience is college students.” |
| 3rd | “Add a line about the lifetime warranty. Keep it under 80 words.” |
| 4th | “Perfect. Now give me 3 variations for A/B testing.” |
Each follow-up builds on the full context of the conversation. This “refine as you go” approach is often easier and more effective than trying to write the perfect prompt on the first try.
Quick Reference: Technique Comparison
Different tasks call for different techniques. Here’s how to choose:
| Technique | What It Is | When to Use It |
|---|---|---|
| Zero-Shot | Direct instruction, no examples | Simple questions, translations, summaries |
| Few-Shot | Providing 3–5 example pairs | Specific formats, classification, consistent tone |
| Chain-of-Thought | Forcing step-by-step reasoning | Math, logic, debugging, multi-step analysis |
| Role Prompting | Assigning a persona (“You are a…”) | Any task where expertise or perspective matters |
| Step-Back | Ask a general question first, then the specific one | Creative tasks where the AI gives shallow answers |
The Biggest Mistakes People Make
After analyzing hundreds of prompts, these are the patterns that consistently produce bad output:
- Being too vague. “Help me with marketing” gives the AI nothing to work with. Be specific about what, for whom, and in what format.
- Not providing context. The AI doesn’t know your business, your audience, or your goals unless you tell it.
- Accepting the first response as final. The first output is a draft. Use follow-ups to shape it into exactly what you need.
- Dumping a document with no instructions. Pasting 5,000 words and hoping for the best doesn’t work. Tell the AI what to do with it.
- Asking multiple unrelated questions in one prompt. Ask one thing at a time, or number your questions clearly.
- Never specifying the audience. “Explain this” is ambiguous. “Explain this for a non-technical executive” is actionable.
These Principles Work Across Every AI Model
Whether you’re using ChatGPT, Claude, Gemini, Copilot, or any other tool — these best practices work because they’re based on how language models process information, not on any platform-specific trick.
That said, each model does have specific strengths worth knowing about:
- Claude excels with XML-structured prompts and handles complex, multi-part instructions particularly well.
- ChatGPT (GPT-4/5) has strong system message persistence and offers Structured Outputs for guaranteed JSON formatting.
- Gemini can process massive context windows (up to 2 million tokens) and handles multimodal input (text + images + video).
The fundamentals — clarity, specificity, structure, examples, and iteration — are universal.
Want the Complete System? Get the Full Guide Pack.
AI Prompt Engineering Best Practices — The Complete Bundle
Everything in this article (and a whole lot more) organized into 6 step-by-step guides, a 37-prompt template library, and a quickstart welcome sheet.
| ✅ Guide 1: How AI Actually Works (the mental model) |
| ✅ Guide 2: Structuring Prompts (Delimiters & Bento-Box) |
| ✅ Guide 3: Core Techniques (Zero-Shot, Few-Shot, CoT) |
| ✅ Guide 4: Tuning Knobs (Temperature, Top-P, Top-K) |
| ✅ Guide 5: Advanced Strategies & Model-Specific Tips |
| ✅ Guide 6: Practical Prompting for Web Chat Users |
| ✅ Prompt Library: 37 Copy-Paste Templates |
| ✅ Welcome Quickstart Sheet |
Google Docs–compatible .docx files. Instant download. No coding or API access required.
Start Improving Your Prompts Today
You don’t need to master everything at once. Start with the two highest-impact changes:
- Be specific. Add context, audience, format, and constraints to your next prompt and compare the result to what you normally get.
- Use follow-ups. Stop treating your first prompt as final. Send it, then refine with 2–3 follow-up messages.
That alone will put you ahead of the vast majority of AI users. And if you want the full system — the complete guides, ready-to-use templates, model-specific strategies, and advanced techniques — grab the complete bundle here.
The models keep getting smarter. But the gap between a careless prompt and a well-engineered one isn’t closing — it’s widening. The people who learn this skill now will compound that advantage every single day they use AI.
Want the complete system with 6 guides, 37 prompt templates, and model-specific cheat sheets? Get the AI Prompt Engineering Best Practices bundle →
How to Install OpenClaw with Docker (Step-by-Step)
What This Guide Covers
This guide walks through installing OpenClaw using Docker, the easiest and most reliable way to run it locally.
By the end of this guide you’ll have:
-
OpenClaw running in a Docker container
-
The gateway configured
-
Your first agent ready to connect to AI providers
This method works on:
-
macOS
-
Linux
-
Windows (WSL2)
-
Synology / NAS environments that support Docker
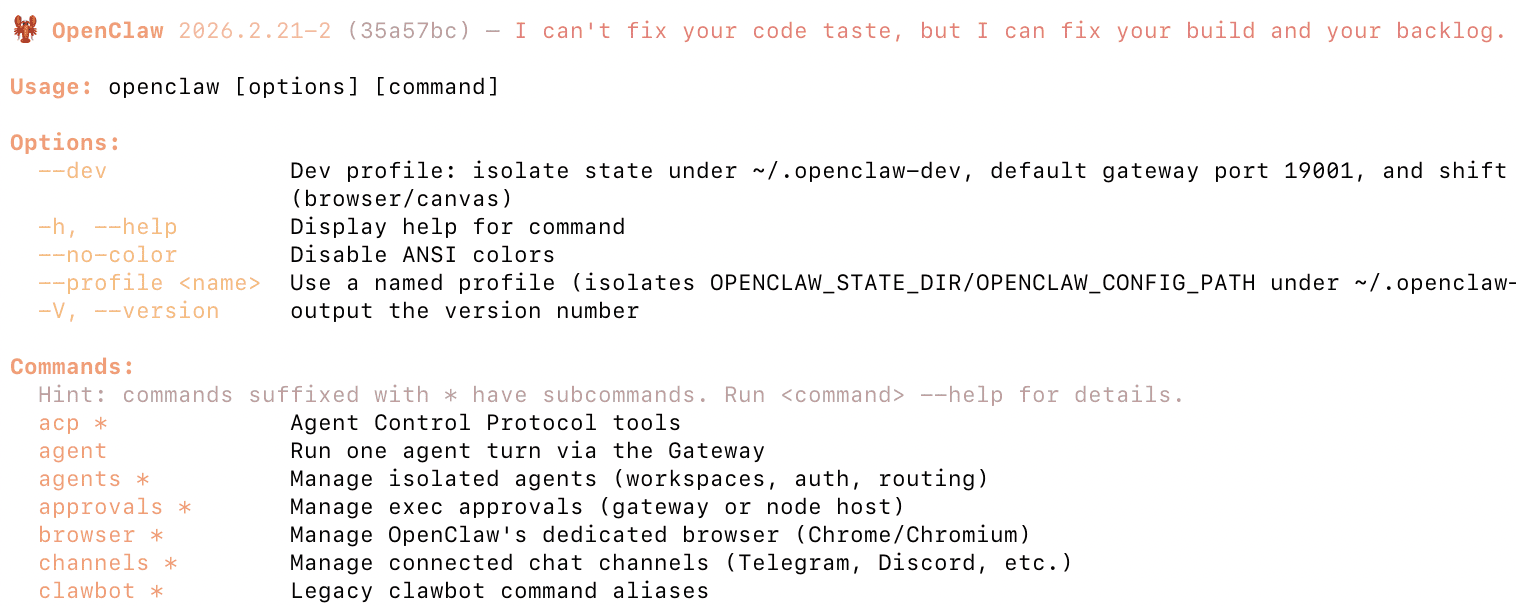
What OpenClaw Actually Installs
Before installing, it helps to understand what you’re running.
OpenClaw consists of three main pieces:
| Component | What it does |
|---|---|
| Gateway | The core service that runs the agent |
| Workspace | The environment where the agent performs tasks |
| AI Provider | The model powering the agent (OpenAI, Anthropic, etc.) |
Docker packages these pieces into a container so you don’t need to manually install dependencies.
Requirements
Before installing OpenClaw you need:
1. Docker installed
Check if Docker is installed:
If it isn’t installed yet:
-
macOS / Windows → Install Docker Desktop
-
Linux → Install Docker Engine
Minimum recommended system:
| Resource | Recommendation |
|---|---|
| RAM | 8GB |
| CPU | 4 cores |
| Disk | 10GB free |
OpenClaw can run on less, but builds may take longer.
Step 1 — Clone the OpenClaw Repository
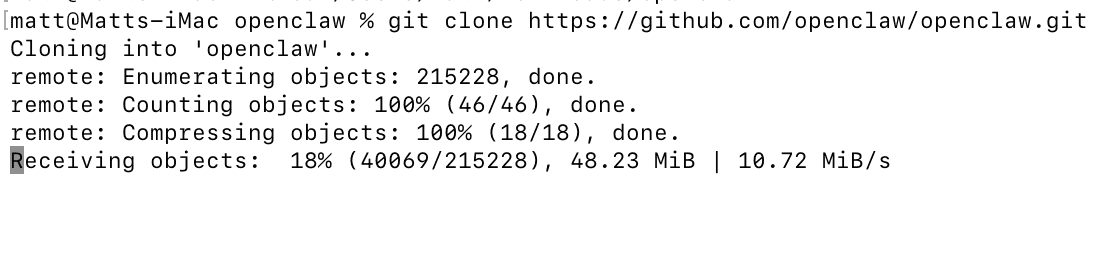
Download the project from GitHub.
cd openclaw
This repository includes:
-
Docker configuration
-
setup scripts
-
onboarding tools
-
environment configuration
Step 2 — Run the Docker Setup Script
The easiest way to install OpenClaw is using the included setup script.
This script automatically:
-
Builds or pulls the OpenClaw Docker image
-
Starts the Docker containers
-
Runs onboarding
-
Creates the
.envconfiguration file -
Generates your gateway token
You do not need to manually run Docker commands.
Optional: Use the Prebuilt Image (Faster)
If you want to avoid building locally, you can use the official container image.
This can save several minutes during installation.
Step 3 — Complete Onboarding
During setup you’ll be asked to configure your AI provider.
Common choices:
| Provider | Notes |
|---|---|
| OpenAI | Most widely used |
| Anthropic | Often better for reasoning |
| Local models | Possible but requires more setup |
You will typically enter an API key.
Example:
Step 4 — Start the Gateway
Once setup finishes, start OpenClaw.
This launches the gateway container in the background.
Step 5 — Verify OpenClaw Is Running
Check container status:
You should see something like:
If it is running, the installation succeeded.
You can also check logs:
Where OpenClaw Stores Data
By default OpenClaw stores data inside the container.
For persistent data, you can mount a workspace folder.
Example:
This allows agents to keep files between restarts.
Updating OpenClaw
To update OpenClaw later:
docker compose pull
docker compose up -d
Troubleshooting
Docker build fails
Try using the prebuilt image:
Container stops immediately
Check logs:
Most failures come from:
-
missing API keys
-
incorrect environment variables
-
port conflicts
Out of memory errors
OpenClaw builds can require several gigabytes of RAM.
Try increasing Docker memory limits or using the prebuilt image.
Optional Advanced Setup
Advanced users may want to enable:
-
sandbox mode
-
browser automation
-
persistent workspaces
-
multi-agent orchestration
These require additional Docker configuration.
Final Thoughts
Installing OpenClaw with Docker removes most of the complexity of dependency management. Once running, you can begin experimenting with autonomous agents, automation workflows, and AI-driven tasks.
How Much Does Claude Code Cost? Pricing, Plans, and How to Save Money
Claude Code is available through Anthropic’s subscription plans starting at $20 per month, with higher tiers offering more usage and access to the most powerful models. You can also use pay-as-you-go API billing for more flexibility. This guide breaks down every option so you can choose the plan that matches how you actually work and avoid paying more than you need to.
If you are new to Claude Code, start with our overview of what Claude Code is before diving into pricing. Ready to get started? Head to our installation guide.
Anthropic offers several subscription tiers that include Claude Code. Each uses session-based usage limits that reset every five hours, so your capacity refreshes throughout the day rather than being a single monthly allowance.
The Free plan provides access to Claude.ai chat but very limited Claude Code functionality. For any real development work, a paid plan is necessary.
The Pro plan costs $20 per month billed monthly, or $17 per month with annual billing. It includes Claude Code access with moderate limits, roughly 10 to 40 prompts every five hours depending on complexity. Pro works for learning Claude Code, light development, and occasional coding sessions. It also includes file creation, code execution, Projects, and web search.
The Max plan comes in two tiers. Max 5x at $100 per month gives you five times the Pro usage. Max 20x at $200 per month gives twenty times Pro limits. Both include access to the Opus model, the most capable for complex engineering, and priority during high-demand periods. Max is for developers who rely on Claude Code as a primary daily tool.
API Pay-As-You-Go Pricing
If you prefer usage-based billing, use Claude Code with an Anthropic Console account and API key. You pay per token, with costs varying by model. Sonnet runs $3 per million input tokens and $15 per million output tokens. Opus costs significantly more but delivers stronger reasoning.
API pricing offers precise cost control and no hard usage caps, which matters for automation and scaling. However, costs can be variable and high with heavy use. One developer tracked eight months of heavy daily usage that would have cost over $15,000 on API pricing but only $800 on the Max plan. For most developers using Claude Code daily, the subscription wins on cost.
The API also offers batch processing at 50 percent off for non-urgent tasks and prompt caching that charges only 10 percent for cached content after the first request. System prompts and CLAUDE.md files are cached automatically.
Team and Enterprise Plans
For organizations, the Team plan starts at $25 per Standard seat per month with annual billing. Standard seats include collaboration features but not Claude Code. Premium seats at $150 per month add Claude Code access and early features, suited for technical teams. Enterprise plans include all Team features with additional governance and security. Contact Anthropic for Enterprise pricing.
Which Plan Should You Choose?
If you are starting out or use Claude Code a few times per week, Pro at $20 per month provides enough capacity for learning and light tasks. You will hit limits during sustained sessions, but for occasional use it works.
If Claude Code is a regular part of your workflow, Max 5x at $100 per month is the sweet spot. It handles daily professional work including complex debugging, feature implementation, and code review without constant limit interruptions.
For power users running Claude Code continuously across multiple projects or needing unrestricted Opus access, Max 20x at $200 per month offers the highest capacity. If your equivalent API costs would exceed $200 monthly, this tier saves significant money.
If your usage is unpredictable or you are integrating Claude Code into automated pipelines, API billing provides flexibility but requires monitoring. Start with a small amount of credits to understand your patterns before committing.
How to Track and Reduce Costs
The /cost command shows your session’s token usage and estimated cost, most useful for API users. For continuous visibility, configure the status line to show token usage at all times.
The most effective cost reduction strategies are clearing context between tasks with /clear so you stop paying for irrelevant history, using /compact to summarize long conversations, and choosing Sonnet over Opus for routine tasks. Sonnet handles most coding work well at much lower cost per token.
For teams, administrators set workspace spend limits in the Anthropic Console and view usage reports. The average API cost is roughly $6 per developer per day, with 90 percent of users staying below $12 daily. For configuration details, see our setup guide.
Understanding Usage Limits
Anthropic introduced weekly rate limits in August 2025 on top of the five-hour session resets. These primarily affect power users running Claude Code continuously and impact less than five percent of subscribers according to Anthropic. Pro and Max plans have different thresholds, with Max getting proportionally higher caps.
Claude Code sessions consume more capacity than regular chat because they include system instructions, full file contexts, long code outputs, and multiple tool calls per interaction. You will use your allocation faster than in the Claude.ai chat interface. Max subscribers can purchase additional usage beyond rate limits at standard API rates if needed.
For more on how tokens and context windows work technically, read how Claude Code works under the hood. To learn practical efficiency techniques, see our guide to using Claude Code effectively.
How Does Claude Code Work? Models, Architecture, and MCP Integration Explained
Claude Code is more than a chatbot that writes code. It is an agentic system that reads your files, executes terminal commands, manages git operations, connects to external services, and coordinates with other tools, all while maintaining awareness of your full codebase. Understanding how it works helps you use it more effectively, choose the right model, manage context, and extend it with external tools through MCP.
For a general overview of what Claude Code does, see what is Claude Code. To start using it right away, check out how to use Claude Code.
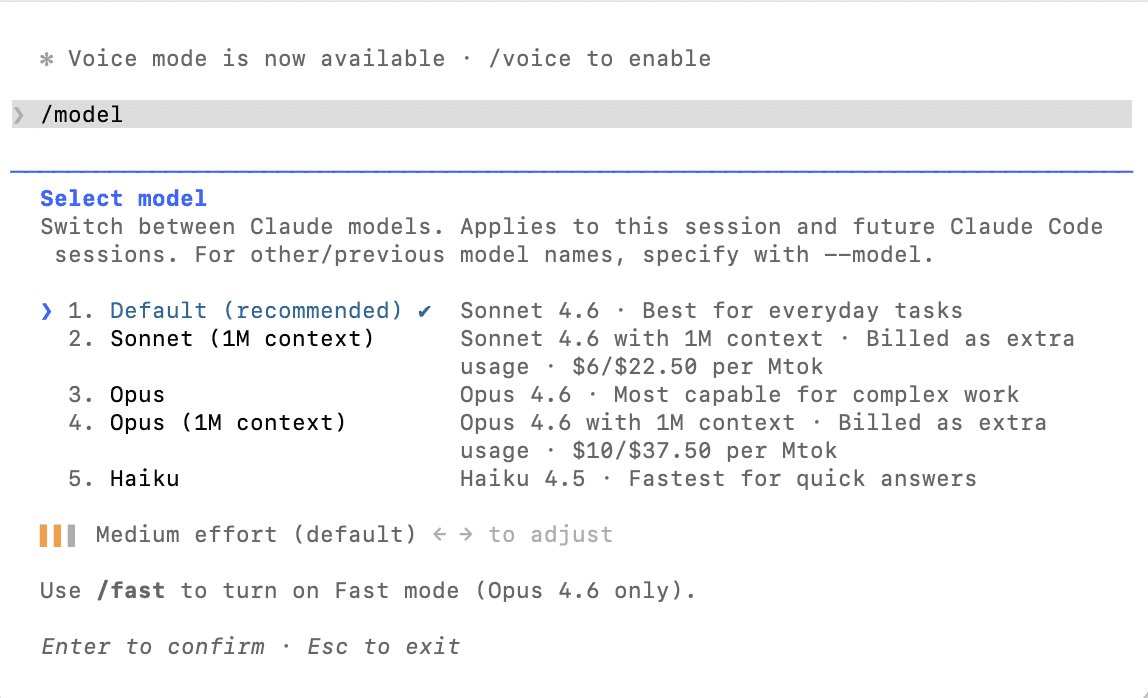
Claude Code runs on Anthropic’s Claude family of large language models. By default, it uses Claude Sonnet, which balances coding capability and speed well for most development tasks. Subscribers on Max plans also get access to Claude Opus, the most capable model, which excels at complex multi-step reasoning, architectural decisions, and debugging subtle issues.
Switch between models during a session with the /model command. Sonnet is faster and cheaper per token, ideal for routine tasks like writing tests, fixing lint errors, and generating boilerplate. Opus takes longer per response but produces higher quality results for challenging problems. Haiku is also available as the fastest, most economical option for simple tasks.
The specific model versions evolve as Anthropic ships updates. Claude Code automatically uses the latest versions, so you benefit from improvements without changing any configuration. The models have large context windows allowing Claude Code to process significant amounts of code and conversation history in a single session.
How Claude Code Processes Your Requests
When you send a message, Claude Code assembles a prompt that includes your system configuration from CLAUDE.md files, conversation history, referenced file contents, and your current request. This prompt goes to the Claude API, which returns a response containing text explanations, code suggestions, or tool use requests.
Tool use is what makes Claude Code agentic. The model can request to read files, write files, execute bash commands, search your codebase, and interact with MCP servers. Each tool use requires your approval by default unless you have pre-configured permissions. After a tool executes, the result feeds back to the model for the next step, creating an iterative loop.
This means a single request from you might result in Claude Code reading several files, running a test suite, identifying failures, editing code, running tests again, and reporting success, all as part of one interaction. The model decides which tools to use and in what order based on your request and the results at each step.
Context Windows and Token Management
Every session operates within a context window, the total amount of text the model considers at once. This includes system prompts, CLAUDE.md files, conversation history, file contents, and tool results. As sessions grow, context fills up and needs management.
Claude Code handles this through auto-compaction, which summarizes conversation history when approaching limits. You can trigger manual compaction with /compact, optionally specifying what to prioritize. The /clear command discards context entirely for switching to unrelated tasks.
Prompt caching reduces both cost and latency. System prompts and CLAUDE.md content that does not change between messages gets cached, so subsequent interactions process faster at reduced cost. This is why well-structured CLAUDE.md files matter for both quality and efficiency. For detailed cost management, see our pricing guide.
How Claude Code Reads and Edits Your Codebase
Claude Code uses agentic search to understand your codebase rather than requiring manual file selection. When you ask about your project, it searches file names, contents, and structure to find relevant code, working like an AI-powered grep. For file editing, changes are proposed as diffs you review before accepting. In the terminal, diffs display inline. In VS Code and other IDEs, they appear as visual overlays. See our guide on using Claude Code in VS Code for the IDE experience.
Claude Code can spawn multiple sub-agents for parallel work. A lead agent coordinates the task and assigns parts to specialized sub-agents, each with their own context window. This is powerful for large refactoring jobs spanning many files.
How to Add MCP Servers to Claude Code
The Model Context Protocol is an open standard that extends Claude Code beyond your local codebase. By adding MCP servers, you connect Claude Code to GitHub, Jira, Google Drive, Slack, databases, and any custom tooling you build.
Add servers with the “claude mcp add” command, specifying the server name, transport type, and connection details. Configure them at the project level in a .mcp.json file in your project root, or globally in your Claude Code settings. Project-level configuration is best for servers specific to one project. Global configuration suits general-purpose servers like Slack or Google Drive.
For servers requiring OAuth authentication, Claude Code supports pre-configured client credentials. Use the –client-id and –client-secret flags with “claude mcp add” for servers that do not support Dynamic Client Registration.
Common MCP Server Setups
GitHub is one of the most popular MCP servers. It lets Claude Code read issues, create branches, open and review pull requests, and manage repository workflows. Combined with code editing, this creates a complete loop from issue to merged PR without leaving your terminal.
Google Drive connects Claude Code to your documents, useful for implementing features based on specs stored outside your repo. Slack integration enables automated status updates after completing tasks. Database servers let Claude query your development databases to understand schemas, verify fixes, or generate migrations. Custom MCP servers can wrap any API or internal tool.
Managing MCP Permissions and Troubleshooting
When you add a server, Claude Code asks permission before using its tools. Pre-configure permissions with wildcard syntax in your settings. “mcp__servername__*” allows all tools from a server, while more granular patterns restrict specific tools. The /permissions command shows and manages your rules.
If an MCP server shows as “pending” and never connects, verify the server process is running and accessible from your terminal environment. WSL users should ensure the server is reachable from the Linux side. The /debug command helps troubleshoot connection issues. Servers loaded from .mcp.json can get stuck pending in non-interactive mode with -p, which restarting in interactive mode resolves.
Be selective about which servers you connect. Each adds tool definitions to your context, consuming tokens. Five servers with 10 tools each means 50 tool definitions on every message. Only connect servers you actively use. Use project-level .mcp.json so servers only load for relevant projects.
How to Access Claude Code
Claude Code is accessible through several surfaces. The terminal CLI runs on macOS, Linux, and Windows. IDE extensions work in VS Code, Cursor, Windsurf, and JetBrains. The web interface at claude.ai/code runs in your browser without local installation. Sessions move between surfaces with /teleport.
All access methods require a Claude subscription or Anthropic Console account. For pricing details, see our cost guide. To get set up, follow our installation guide and then the configuration walkthrough.
What Is Claude Code? A Complete Guide to Anthropic’s AI Coding Assistant
Claude Code is an AI-powered agentic coding tool built by Anthropic that lives directly in your terminal. Unlike traditional code assistants that autocomplete lines or answer questions in a chat window, Claude Code understands your entire codebase, executes commands, edits files across your project, manages git workflows, and handles complex development tasks through natural language conversation.
Whether you are a seasoned developer looking to speed up repetitive tasks or someone exploring AI-assisted development for the first time, Claude Code represents a fundamentally different approach to writing software. Instead of switching between a chatbot and your editor, you stay in your terminal and describe what you need done in plain English.
Claude Code at a Glance
At its core, Claude Code is a command-line interface that gives you conversational access to Anthropic’s most capable AI models. You launch it from your terminal, navigate to your project folder, and start describing what you want to accomplish. Claude Code then reads your files, understands the context, and takes action by editing code, running tests, creating new files, or executing shell commands on your behalf.
Claude Code is not limited to the terminal, though. It integrates with popular editors like VS Code, Cursor, Windsurf, and JetBrains IDEs through native extensions. You can even run it directly in your browser at claude.ai/code without any local setup, or hand off sessions between devices using the teleport feature. For a detailed walkthrough of editor integration, see our guide on how to use Claude Code in VS Code and Cursor.
Who Makes Claude Code?
Claude Code is developed and maintained by Anthropic, the AI safety company founded in 2021 by former OpenAI researchers including Dario and Daniela Amodei. Anthropic builds the Claude family of large language models that power the tool, and focuses on creating reliable, interpretable AI systems. Claude Code is one of their flagship developer products alongside the Claude API and Claude.ai chat interface.
The tool is open source on GitHub at github.com/anthropics/claude-code, meaning you can inspect the code, report issues, and follow development progress. Anthropic actively maintains it with new releases shipping regularly through automatic background updates.
What Is the Claude Code CLI?
When people say “Claude Code CLI,” they mean the core command-line interface that you interact with in your terminal. After installation, you type “claude” to launch an interactive session. From there, you type natural language requests, use slash commands like /init to generate a project configuration file or /clear to reset context, and reference specific files using the @ symbol.
The CLI supports several flags for different workflows. Running “claude -p” followed by a prompt gives you a single response without entering interactive mode, which is perfect for scripting and automation. The “claude -c” flag resumes your last conversation, and “claude –model” lets you switch between different AI models. There is no separate CLI package to download. The main installation gives you everything. For a deep dive into terminal workflows, see how to use Claude Code in the terminal.
What Makes Claude Code Different From Other AI Coding Tools?
Most AI coding assistants work as plugins inside your editor, offering suggestions as you type. Claude Code takes a different philosophy by following the Unix tradition of composable tools. You can pipe logs into it, run it inside CI/CD pipelines, chain it with other command-line utilities, or spawn multiple agents working on different parts of a task simultaneously.
Claude Code also has full agentic capabilities. It does not just suggest code and wait for you to copy and paste. It reads files, writes changes, executes terminal commands, runs your test suite, commits to git, and even opens pull requests. You review and approve each action, keeping you in control while Claude handles the heavy lifting.
The tool connects to external services through the Model Context Protocol, or MCP, which lets it read design docs from Google Drive, update tickets in Jira, pull data from Slack, or interact with any custom tooling you build. To understand how all of this works under the hood, read our deep dive on how Claude Code works, what models it uses, and how to extend it with MCP.
What Can You Do With Claude Code?
On the routine side, Claude Code excels at writing tests for untested code, fixing lint errors across a project, resolving merge conflicts, updating dependencies, and generating release notes. These are the tedious chores that eat up developer time, and Claude Code automates them through simple natural language prompts.
For more complex work, Claude Code implements entire features spanning multiple files, refactors large codebases, debugs tricky issues by reading error logs and tracing through code paths, and explains unfamiliar codebases to help you onboard faster. It supports multi-agent workflows where a lead agent coordinates several sub-agents working on different components simultaneously.
How Good Is Claude Code?
Claude Code’s quality depends on which model you use and how well you structure your requests. With Opus, the most powerful model, it handles complex architectural reasoning, multi-file refactoring, and subtle debugging with strong results. It consistently ranks among the top AI coding tools for understanding large codebases and maintaining context across extended development sessions.
For routine tasks like writing tests, implementing features from clear specifications, fixing bugs, and managing git workflows, Claude Code is highly effective with any model tier. Where it is less strong is in areas requiring domain knowledge about proprietary internal frameworks or very recently released libraries. The CLAUDE.md configuration file helps mitigate this by giving Claude Code explicit context about your project’s specifics.
How Much Does Claude Code Cost?
Claude Code is included with Anthropic subscription tiers. The Pro plan at $20 per month gives you access with moderate usage limits. Max plans at $100 and $200 per month offer significantly higher usage caps and access to Opus. You can also use pay-as-you-go API billing through the Anthropic Console. For a full breakdown of every plan, usage limits, and cost optimization tips, check out our detailed Claude Code pricing guide.
Getting Started
Setting up Claude Code takes just a few minutes on macOS, Linux, or Windows. Anthropic provides native installers that do not require Node.js. After installing, you authenticate with your Anthropic account and navigate to your project directory to start your first session.
Follow our step-by-step installation guide covering Mac, Windows, and Linux. Once installed, our guide on setting up, configuring, and keeping Claude Code updated walks you through authentication, CLAUDE.md files, and your first productive session. When you are ready to dive in, see our complete practical guide to using Claude Code.
How to Install Claude Code on Mac, Windows, and Linux
Installing Claude Code takes just a few minutes regardless of your operating system. Anthropic now offers native installers as the recommended method, and the entire process goes from download to first coding session in about five minutes. This guide covers every installation method for every platform so you can get Claude Code running quickly.
If you are new to the tool and want to understand what it does before installing, start with our overview of what Claude Code is and what it can do.
Claude Code runs on macOS 10.15 or later, most Linux distributions including Ubuntu 20.04 and Debian 10, and Windows 10 or later. You need at least 4GB of RAM and an active internet connection. The native installer does not require Node.js, which simplifies setup considerably compared to older npm-based methods.
You also need either a Claude Pro or Max subscription, or an Anthropic Console account with API credits. Claude Code authenticates through your browser on first launch, so make sure you have an active account ready. Not sure which plan to pick? See our Claude Code pricing breakdown.
Installing Claude Code on Mac
Open Terminal on your Mac. You can find it in Applications, then Utilities, or press Command+Space and type Terminal. Run the native install script from Anthropic’s official source. The installer downloads the correct binary for your Mac architecture, whether Intel or Apple Silicon, and configures your PATH automatically.
After the script finishes, verify the installation by typing “claude –version” in your terminal. You should see a version number without errors. The native macOS binary is signed by Anthropic PBC and notarized by Apple, so you should not see Gatekeeper warnings. If your Mac blocks it, go to System Preferences, then Security and Privacy, and allow the installer.
Mac users who prefer Homebrew can install with the brew install command instead. The important difference is that Homebrew installations do not auto-update. You need to manually run “brew upgrade claude-code” periodically. For most Mac users, the native installer is the better choice because of its automatic background updates.
Installing Claude Code on Windows
Windows users have two solid options: native installation or WSL.
For native installation, use WinGet from PowerShell or Command Prompt by running “winget install Anthropic.ClaudeCode” and following the prompts. After installation, verify with “claude –version” in Git Bash, PowerShell, or Command Prompt. Native Windows requires Git Bash for the full Claude Code experience. If you do not have it, install Git for Windows from the official Git website, which includes Git Bash. Windows Terminal is recommended as your terminal emulator. Note that WinGet installations do not auto-update, so run “winget upgrade Anthropic.ClaudeCode” periodically.
For WSL installation, open PowerShell as Administrator and run “wsl –install -d Ubuntu” to set up WSL with Ubuntu. Reboot when prompted. After rebooting, open your Ubuntu terminal, update packages with “sudo apt update && sudo apt upgrade -y,” and install Git with “sudo apt install git -y.” Then run the Claude Code install script from your Ubuntu terminal, just as you would on native Linux. WSL 2 is recommended over WSL 1 because it supports Bash tool sandboxing for enhanced security.
For WSL users who also use VS Code, connect VS Code to your WSL environment by running “code .” from your WSL terminal. This lets you use the Claude Code extension while Claude Code runs in WSL. Read more in our guide on using Claude Code in VS Code and Cursor.
Installing Claude Code on Linux
On Linux, open your terminal and run the native install script. The process is identical to macOS. The installer detects your distribution and architecture, downloads the correct binary, and sets up your PATH. Verify with “claude –version” after installation. Native installations on Linux auto-update in the background just like on Mac.
The npm Method (Deprecated)
Older guides may reference installing Claude Code globally through npm. While this still works, Anthropic has deprecated it in favor of native installers. If you have an existing npm installation, migrate by running “claude install” from your terminal, which switches you to the native binary while preserving your settings and project configurations.
If you do use npm, ensure you have Node.js version 18 or higher. Never use sudo with npm install as this causes permission issues. Instead, configure a user-level npm directory by running “mkdir ~/.npm-global” and updating your npm prefix and PATH accordingly.
Installing the CLI Specifically
There is no separate Claude Code CLI package. When people search for “how to install Claude Code CLI,” they mean the main tool itself. Every installation method above installs the full CLI, which includes both the interactive chat mode and the non-interactive pipeline mode for scripting and automation.
How to Download Claude Code
If you prefer a downloadable binary rather than a command-line installer, the GitHub releases page at github.com/anthropics/claude-code has binaries for each platform. You can also access Claude Code in your browser at claude.ai/code with no download needed, which is useful for trying it before committing to a local install.
IDE extensions are available separately in the VS Code marketplace and JetBrains marketplace. These connect to the Claude Code backend on your machine and are covered in our VS Code and Cursor integration guide.
Verifying and Troubleshooting Your Installation
Run “claude –version” to confirm Claude Code is installed correctly. If you see “command not found,” your PATH is likely not configured. Close and reopen your terminal to refresh, then try again. On macOS, check that your .zshrc file includes the installation directory in PATH. On Linux, check .bashrc. On Windows, ensure Git Bash or your preferred terminal can find the binary.
Anthropic provides a diagnostic command, “claude doctor,” that checks your installation type, version, authentication status, and configuration for common issues. Run this whenever something seems off.
If troubleshooting does not resolve the issue, a clean reinstall usually works. Remove the binary and any configuration files, then follow the installation steps again from scratch.
Next Steps
With Claude Code installed, head to our guide on setting up Claude Code for authentication, CLAUDE.md configuration, updates, and your first session. When you are ready to start working, our complete usage guide covers practical workflows and tips for getting the best results.
How to Set Up Claude Code: Configuration, Updates, and Your First Session
Installing Claude Code is only step one. Proper setup, including authentication, CLAUDE.md configuration, permissions, and understanding the update cycle, is what turns a fresh install into a productive daily tool. This guide covers the full lifecycle from first launch to keeping Claude Code current, checking your usage, and even uninstalling cleanly if you ever need to.
If you have not installed Claude Code yet, start with our installation guide for Mac, Windows, and Linux. For a general overview, see what Claude Code is.
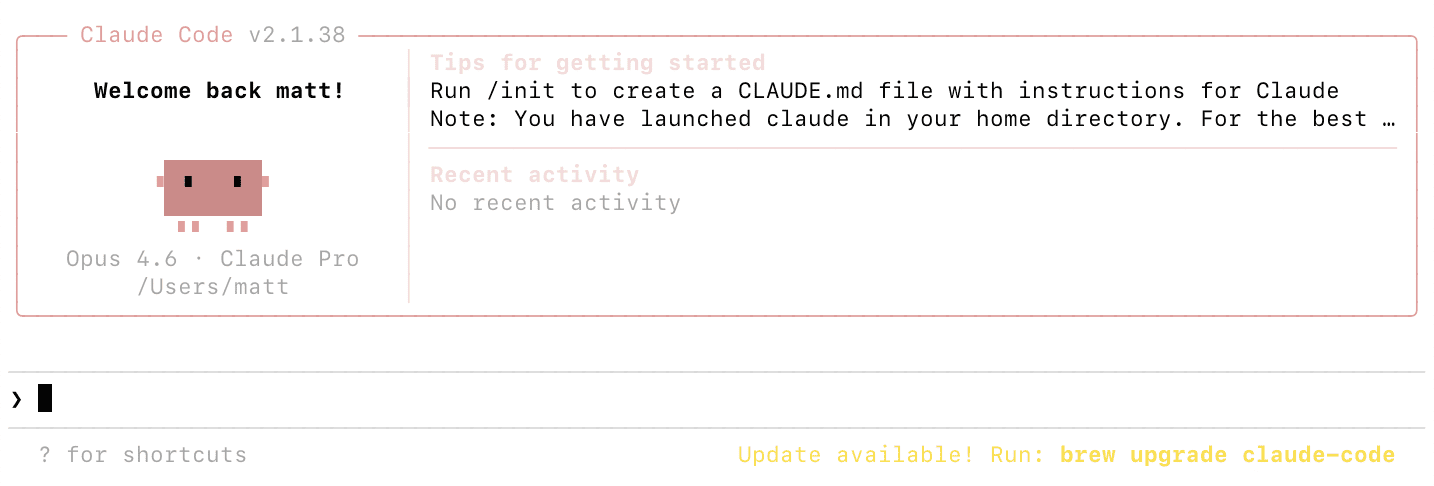
Navigate to your project directory in the terminal and type “claude” to launch your first session. On first launch, Claude Code opens a browser window asking you to authenticate. Sign in with your Claude Pro, Max, or Anthropic Console account. After authentication, you return to your terminal and Claude Code is ready.
If the browser does not open automatically, copy the URL displayed in your terminal and paste it into your browser. This is common on WSL and headless server environments. Once authenticated, credentials are stored locally so future launches start immediately.
For API key authentication instead of browser-based OAuth, set the ANTHROPIC_API_KEY environment variable in your shell. Add the export line to your shell configuration file (.zshrc on macOS, .bashrc on Linux) to persist it across sessions. Get your API key from the Anthropic Console at console.anthropic.com.
Setting Up CLAUDE.md
CLAUDE.md is the most important configuration file for getting good results. It is a Markdown file that Claude Code reads at the start of every session, containing your coding standards, architecture decisions, preferred libraries, common commands, and any instructions you want Claude to follow consistently.
Run /init in a Claude Code session to generate a CLAUDE.md with recommended defaults. Claude Code analyzes your project structure and creates a starting configuration you can customize. Alternatively, create the file manually in your project root.
CLAUDE.md works in a hierarchy. A global file at ~/.claude/CLAUDE.md applies to all projects and is a good place for personal coding preferences. A project-level file at ./CLAUDE.md in your repo root contains project-specific instructions. You can add CLAUDE.md files in subdirectories for component-specific guidance. More specific settings override more general ones.
Include your preferred languages and frameworks, naming conventions, testing expectations, directory structure explanations, deployment procedures, and review checklists. The more context you provide, the better Claude Code aligns with your workflow.
Configuring Permissions and Security
Claude Code asks for permission before executing impactful actions like writing files and running shell commands. You can pre-configure allowed tools in your settings.json file to avoid repeated prompts. For example, allow read operations and git commands while requiring approval for file writes and arbitrary bash commands.
Settings.json also lets you configure model preferences, maximum token limits, and hooks that run shell commands before or after Claude Code actions. You might set up a hook that auto-formats code after every file edit, or runs your linter before every commit. WSL 2 installations support sandboxing for enhanced security, isolating command execution in a controlled environment.
Setting Up Custom Slash Commands
Create custom slash commands to package repeatable workflows your team can share. Store definitions in .claude/commands/ for project-specific commands or ~/.claude/commands/ for personal commands across all projects. For example, a /review-pr command that runs a standard code review workflow, or a /deploy-staging command for your deployment checklist. These save time and tokens by packaging multi-step instructions into a single shortcut.
How to Check Claude Code Usage
Use the /cost command during a session to see your current token usage, duration, and estimated cost. For API users paying per token, this is essential for budget tracking. For subscription users, /cost shows consumption but does not directly relate to billing since your cost is fixed monthly.
For teams, administrators can view detailed cost and usage reporting in the Anthropic Console. When you first authenticate with a Console account, a workspace called “Claude Code” is automatically created for centralized tracking. You can set spend limits on this workspace to prevent unexpected costs.
The status line can be configured to display token usage continuously, so you always know how much context you are consuming. This helps you decide when to use /compact to reduce context size or /clear to start fresh. For a full cost analysis and plan comparison, see our Claude Code pricing guide.
How to Update Claude Code
If you installed using the native installer, updates happen automatically in the background. Claude Code checks for updates on startup and periodically while running, downloads, and installs them without any action from you. You see a notification when updates are installed.
For Homebrew installations on macOS, auto-update is not supported. Run “brew upgrade claude-code” periodically. For WinGet on Windows, run “winget upgrade Anthropic.ClaudeCode” to update. Setting a recurring reminder to check weekly or biweekly is good practice for these methods.
To force an immediate update check on any installation type, run “claude update.” Check your current version with “claude –version” and compare against the latest release on the Claude Code GitHub repository or npm page.
How to Upgrade Your Claude Code Plan
Upgrading from Pro to Max or between Max tiers happens through your account settings on claude.ai. The change takes effect immediately with new usage limits applying to your current session. No reinstallation or reconfiguration is needed since Claude Code automatically detects your subscription level. For help choosing a plan, see our pricing breakdown.
Running Claude Doctor for Diagnostics
If something seems wrong, run “claude doctor” to check your installation. It verifies installation type, version, configuration, authentication status, and connectivity. The output identifies common issues like outdated versions, missing PATH entries, or configuration errors, and suggests fixes. This is the first thing to try when Claude Code behaves unexpectedly.
How to Uninstall Claude Code
If you need to remove Claude Code for a clean reinstall or to switch installation methods, the process depends on how you installed it.
For native installations on macOS and Linux, remove the Claude Code binary and the version data directory. For WinGet installations on Windows, use the WinGet uninstall command or standard Windows app removal. For WSL, uninstall from within your Linux environment using the Linux removal process. For Homebrew, use the brew uninstall command. For deprecated npm installations, use npm uninstall with the global flag.
Uninstalling removes the binary but not your configuration files. To do a complete clean removal, also delete the ~/.claude directory and ~/.claude.json file, which contain your settings, allowed tool configurations, MCP server configurations, and session history. On Windows, these are in your user profile directory. Project-specific settings live in .claude/ and .mcp.json within each project folder.
If you have IDE extensions installed in VS Code, Cursor, or JetBrains, uninstall those separately through each editor’s extension manager.
For most troubleshooting scenarios, running “claude doctor” first is better than jumping straight to a full uninstall and reinstall. But when you do need a fresh start, removing everything including configuration files and then following the installation guide again is the most reliable path.
Next Steps
With Claude Code set up and configured, you are ready to start building. Our complete guide to using Claude Code covers practical workflows, essential commands, and tips for effective daily use. For terminal-specific workflows, see how to use Claude Code in the terminal. To understand the technical details of how it all works, read how Claude Code works under the hood.
How to Use Claude Code in the Terminal: Commands, Shortcuts, and Automation
The terminal is where Claude Code is most powerful. Running directly in your command line, it reads your project files, executes commands, and modifies your codebase through natural language conversation. This guide covers everything specific to the terminal experience, from launching and exiting sessions to pipeline automation and multi-agent workflows.
If you have not installed Claude Code yet, follow our installation guide first. For a broader overview of all Claude Code capabilities beyond the terminal, see the complete usage guide.
Navigate to your project directory and type “claude” to launch an interactive session. Claude Code reads your project structure, loads any CLAUDE.md configuration files, and connects to configured MCP servers. You will see a prompt indicator where you can start typing natural language requests.
If this is your first time, Claude Code opens a browser window for authentication. Sign in with your account and return to the terminal. Future launches skip this step. For detailed authentication options, see our setup and configuration guide.
To start with a specific prompt without entering interactive mode, use “claude -p” followed by your prompt in quotes. This is useful for quick one-off tasks and scripting. To resume your most recent conversation, use “claude -c” which picks up exactly where you left off.
How to Run Claude Code in the Terminal
Once your session is active, type requests in plain English at the prompt. Claude Code might read files to understand context, propose edits shown as diffs, or suggest terminal commands to execute. You approve or reject each action.
Reference specific files using @ followed by the path. “@package.json explain the dependencies” focuses Claude on that file. Reference directories like “@src/components/ what does each component do” to scope analysis. If you do not know the exact path, Claude Code can search for it.
Run shell commands directly by prefixing with an exclamation mark. “!git status” shows your git status, “!npm test” runs tests, “!ls -la” lists files. This executes the command directly rather than going through Claude’s conversational interface, which is faster and uses fewer tokens.
Essential Terminal Commands and Shortcuts
The /clear command resets conversation context. Use it when switching tasks so you are not paying for stale context. The /compact command summarizes your conversation to reduce context size while preserving important details. You can customize what to keep with “/compact Focus on the API changes we discussed.” The /cost command shows token usage and estimated cost.
The /model command switches AI models during your session. “/model sonnet” for faster, cheaper responses. “/model opus” for the most capable reasoning. The /init command generates a CLAUDE.md for your project. The /help command lists everything available including custom commands.
Tab completion works for file paths and slash commands. Command history with the up arrow recalls previous prompts. Word deletion with Option-Delete and word navigation with Option-Arrow work on most systems.
How to Exit Claude Code
Type /exit at the prompt or press Ctrl+C to end a session. To pause and return later, use /exit and then “claude -c” next time to resume. Ctrl+D sends an end-of-input signal that also closes the session.
If Claude Code is in the middle of a long operation, press Ctrl+C once to cancel the current action without exiting. Press Ctrl+C again or type /exit to close entirely. Conversation history is preserved automatically for later resumption.
Running Claude Code for Automation and Pipelines
The non-interactive “claude -p” mode is designed for scripting and CI/CD. Pipe input to Claude Code and capture its output, composing it with other Unix tools. Practical examples include monitoring logs with “tail -f app.log | claude -p ‘alert me if there are anomalies'” and reviewing changed files with “git diff main –name-only | claude -p ‘review these files for security issues.'”
For CI/CD integration, Claude Code can review pull requests, generate changelogs, check code quality, or automate anything that benefits from AI understanding of your codebase. The pipeline mode outputs to stdout, making it easy to capture results in automation scripts.
Working With Multiple Sessions and Agents
Run multiple Claude Code sessions simultaneously in different terminal windows or tabs. Each maintains its own conversation context and works on different tasks. The /teleport command moves a session between surfaces, such as from your terminal to the Claude desktop app for visual diff review.
Claude Code supports spawning sub-agents for parallel work. A lead agent coordinates multiple instances, each with its own context window, working on different parts of a large task simultaneously. This is powerful for big refactoring jobs or feature implementations spanning many files.
Terminal Tips for Better Results
Keep your terminal window at least 100 columns wide. Claude Code renders diffs and code snippets that look best with this width, and narrow windows can cause rendering issues. Use a modern terminal emulator: Terminal or iTerm2 on macOS, Windows Terminal on Windows, or any modern terminal on Linux. The terminal should support ANSI colors and Unicode for proper diff and status rendering.
For extended sessions, monitor context with /cost and use /compact when it grows large. Long conversations accumulate tokens and become more expensive per message. Starting fresh with /clear when switching tasks is the most cost-effective habit. For more on managing costs, see our pricing guide.
To understand what happens behind the scenes when you interact with Claude Code, and how to extend it with external tools through MCP, read how Claude Code works.
How to Use Claude Code: A Practical Guide for Developers
Claude Code is a powerful AI coding assistant, but getting the most out of it requires understanding its workflows, commands, and best practices. This guide covers everything from basic interactions to advanced techniques that will help you use Claude Code effectively in your daily development work.
If you have not installed Claude Code yet, start with our installation guide for Mac, Windows, and Linux. For background on what the tool does, see what is Claude Code.
Open your terminal, navigate to your project directory, and type “claude” to launch an interactive session. Claude Code reads your project files and understands the structure of your codebase from the start. You type natural language requests at the prompt, and Claude Code responds by reading files, proposing changes, and executing commands with your approval.
A good first interaction is asking Claude Code to explain your codebase. Type something like “give me an overview of this project’s architecture” and it analyzes your files and provides a summary. This helps you see what Claude Code understands and gives you a baseline for more complex requests.
Essential Commands You Should Know
Claude Code includes built-in slash commands that control its behavior. The /init command generates a CLAUDE.md configuration file for your project. The /clear command resets your conversation context, essential when switching between unrelated tasks to avoid wasting tokens on stale information. The /cost command shows your current session’s token usage. The /compact command summarizes your conversation history to free up context window space while preserving important details.
The /model command switches between AI models mid-session. Sonnet is the default and handles most coding tasks efficiently at lower cost. Opus provides the most capable reasoning for complex decisions. Use /help to see all available commands including custom ones you have created.
Use the @ symbol to reference specific files or directories. For example, “@src/api/users.js explain the authentication flow” directs Claude Code to focus on that file. Execute shell commands within a session by prefixing them with an exclamation mark. “!npm test” runs your test suite without leaving the conversation and costs fewer tokens than asking Claude to do it conversationally. For a deep dive into terminal-specific techniques, see how to use Claude Code in the terminal.
Common Development Workflows
For bug fixes, describe the problem and let Claude Code investigate. It reads error messages, traces through your code, identifies the root cause, and proposes a fix as a diff you review and approve. For feature implementation, describe what you want built and Claude Code creates or modifies the necessary files.
For code reviews, ask Claude Code to review recent changes or a specific file. It checks for security vulnerabilities, performance problems, and maintainability concerns. For refactoring, describe the transformation you want and Claude handles multi-file changes.
Git workflows are another strong use case. Claude Code stages changes, writes commit messages, creates branches, and opens pull requests when connected to GitHub through MCP. Tell it “commit these changes with a descriptive message” and it handles the operations. Learn how to connect these external tools in our guide on how Claude Code works and how to extend it with MCP.
How to Use Claude Code Effectively
Be specific in your requests. Instead of “fix this code,” say “the login endpoint returns a 500 error when the email field is empty. Find and fix the missing validation.” The more context you provide upfront, the better the results.
Use CLAUDE.md files to give Claude Code persistent context about your project. Include coding standards, preferred libraries, architecture decisions, and review checklists. Claude Code reads these at the start of every session, so you do not need to repeat this information in every prompt. For details on setting this up, see our setup and configuration guide.
Clear context between unrelated tasks using /clear. Stale context wastes tokens on every subsequent message. Use /rename before clearing so you can find the session later, then /resume to return when needed.
Switch models based on task complexity. Use Sonnet for writing tests, fixing lint errors, and generating boilerplate. Switch to Opus for complex multi-step reasoning, architectural decisions, and debugging subtle issues.
Using Claude Code in Your IDE
The terminal is the primary interface, but Claude Code also integrates with VS Code, Cursor, Windsurf, and JetBrains IDEs. These extensions show proposed changes as visual diffs, let you share selected code as context, and provide a sidebar panel for interaction without leaving your editor. For complete setup instructions and IDE-specific tips, see our dedicated guide on using Claude Code in VS Code and Cursor.
Non-Interactive Mode and Automation
Claude Code supports non-interactive mode for scripting and CI/CD integration. Run “claude -p” followed by a quoted prompt to get a single response piped to stdout. This enables workflows like monitoring logs with “tail -f app.log | claude -p ‘alert me if you see anomalies'” or reviewing changes with “git diff main –name-only | claude -p ‘review these files for security issues.'”
You can also automate translations, generate documentation, run bulk operations across files, and integrate Claude Code into any automated pipeline. This composability is what makes it fundamentally different from chat-based AI assistants.
Managing Costs While Using Claude Code
Claude Code consumes tokens for each interaction, with costs varying by codebase size, query complexity, and conversation length. Use /cost to monitor usage and /compact to reduce context when it grows large. Clearing context between tasks and choosing Sonnet over Opus for routine work are the most effective ways to keep costs down.
For a full breakdown of subscription plans, API pricing, and cost optimization strategies, read our Claude Code pricing guide. To understand the technical underpinnings of token usage and context windows, see how Claude Code works.