Uncategorized
Vultr vs DigitalOcean: Which Cloud Hosting Platform Is Right for You?
TL;DR: Vultr wins on raw performance, global reach (32 data centers), GPU/AI compute, Windows support, and entry-level pricing. DigitalOcean wins on ease of use, managed services, documentation, predictable billing, and its growing AI platform. Most developers and startups are better served by DigitalOcean. Power users who need bare metal, custom OS environments, or maximum compute per dollar should look at Vultr.
Choosing between Vultr and DigitalOcean comes down to a fundamental trade-off: control versus convenience. Both are excellent developer-focused VPS providers, and both have expanded significantly beyond basic compute — but they serve different builders in meaningfully different ways. This guide breaks down where each platform excels so you can make the right call for your project.
Quick Comparison
| Feature | Vultr | DigitalOcean |
|---|---|---|
| Ease of Use | ⚠️ More complex, fewer tutorials | ✅ Clean UI, industry-leading docs |
| Raw Performance | ✅ High Frequency, Bare Metal, VX1 | ✅ Consistent and reliable for most workloads |
| Windows Hosting | ✅ Supported | ❌ Not supported |
| Custom ISO Upload | ✅ Yes | ❌ No |
| Managed Services | ⚠️ Growing (managed DBs, Kubernetes) | ✅ App Platform, managed DBs, DOKS, serverless |
| GPU / AI Hosting | ✅ Extensive (NVIDIA + AMD, bare metal) | ✅ GPU Droplets + Gradient AI Platform |
| Global Data Centers | 32 locations, 6 continents | ~15 locations (major regions) |
| Pricing Model | ⚠️ Varies by region; extras cost more | ✅ Flat, predictable; per-second billing |
| Entry-Level Price | From $2.50/month (VX1) | From $6/month (Basic Droplet) |
| Free Trial Credits | No free trial | $200 credit for 60 days |
Ease of Use and Developer Experience
DigitalOcean has long been the gold standard for developer-friendly cloud hosting. Its dashboard is clean and intuitive, onboarding takes minutes, and its documentation library — with 6,000+ tutorials — is arguably the best in the industry. Whether you’re spinning up your first Droplet or deploying a managed Kubernetes cluster, DigitalOcean keeps friction low at every step. New accounts also get $200 in free credits for 60 days, giving plenty of room to evaluate the platform before committing.
Vultr offers more advanced configuration options and a broad range of instance types, but its UI and documentation haven’t kept pace with DigitalOcean’s polish. It’s more capable in certain respects, but less guided — which matters more than it sounds for developers who’d rather ship than sysadmin.
Winner: DigitalOcean — by a significant margin for most developers.
Performance and Infrastructure
For raw compute performance, Vultr has the edge. Its High Frequency Compute instances (NVMe SSD, latest-gen CPUs) and Bare Metal servers outperform DigitalOcean in CPU-intensive benchmarks. Vultr also launched VX1 Cloud Compute — a new instance tier offering up to 82% better performance per dollar compared to leading hyperscalers, with faster networking (up to 50 Gbps), dedicated CPU resources, and provisioning in under 15 seconds.
DigitalOcean Droplets deliver consistent, reliable performance that’s more than sufficient for most web apps, APIs, and SaaS workloads. They’ve expanded their lineup to include dedicated CPU Droplets for production workloads and GPU Droplets for AI/ML tasks. For standard web serving and application hosting, the performance gap between the two is minimal in practice.
Winner: Vultr for peak performance. DigitalOcean for consistent day-to-day workloads.
GPU and AI Hosting
This category has changed significantly — it’s now competitive on both sides, not a clear Vultr advantage.
Vultr has long been the stronger GPU platform and continues to invest heavily. It offers a broad range of NVIDIA and AMD GPUs (including NVIDIA Blackwell, A100, H100, AMD MI300X, MI325X, MI355X), available as virtual machines, bare metal, or self-service clusters. Vultr also offers Serverless Inference — auto-scaling GPU infrastructure for deploying LLMs without managing the underlying servers — plus pre-configured AI/ML templates and OpenAI-compatible APIs.
DigitalOcean has now entered the GPU market in a meaningful way. They offer GPU Droplets (NVIDIA A100 and H100) and launched Gradient AI Platform — a developer-friendly interface for building AI agents and applications, with access to hosted models from OpenAI, Anthropic, Meta, Mistral, and others. In March 2026 at NVIDIA GTC, DigitalOcean announced a new Richmond data center built exclusively for AI workloads, featuring NVIDIA HGX B300 systems and a 400 Gbps RDMA fabric. For developers who want AI compute without leaving DigitalOcean’s managed ecosystem, Gradient AI is now a genuine option.
For teams building serious AI infrastructure — model training, high-volume inference, custom GPU clusters — Vultr’s depth and breadth of GPU options remains the stronger choice. For developers who want to integrate AI capabilities into a DigitalOcean-hosted app without spinning up dedicated GPU infrastructure, Gradient AI is now a viable path. For a closer look at DigitalOcean’s GPU options, see our guide to DigitalOcean Droplet types.
Winner: Vultr for dedicated GPU/AI infrastructure. DigitalOcean Gradient for managed AI integration within the DO ecosystem.
Managed Services and Ecosystem
DigitalOcean is the clear winner here. Its managed service lineup is extensive and well-integrated:
- App Platform — a Heroku-like PaaS that deploys directly from GitHub with SSL, CDN, and auto-scaling included
- Managed Databases — PostgreSQL (up to 30TB), MySQL (up to 20TB), MongoDB, Valkey (Redis replacement), Kafka — with storage autoscaling, observability dashboards, and automatic restarts
- Managed Kubernetes (DOKS) — auto-scaling clusters with free control plane; you only pay for worker nodes
- Serverless Functions — event-driven compute without managing infrastructure
- Spaces — S3-compatible object storage
- 1-Click Marketplace — 100+ pre-configured apps including WordPress, Docker, GitLab, and more, deployable in under 60 seconds
Vultr has added managed databases (MySQL, PostgreSQL, Valkey, Kafka) and managed Kubernetes, but the ecosystem is shallower and less polished than DigitalOcean’s. It remains primarily an IaaS provider — you get powerful compute and storage, but you’re responsible for building and maintaining more of the stack yourself.
Winner: DigitalOcean — and it’s not close.
Global Reach
Vultr operates 32 data centers across 6 continents, including locations in underserved regions like South America, India, South Africa, Israel, and Honolulu. If latency to specific global regions matters for your app, Vultr gives you more options.
DigitalOcean covers the major developer markets — US, EU, Asia — with around 15 data center locations. Coverage is strong where most web traffic originates, but it doesn’t match Vultr’s global footprint for edge-sensitive deployments.
Winner: Vultr for edge deployments and underserved regions.
Pricing and Value
Vultr starts cheaper at the entry level — VX1 instances from $2.50/month — and is competitive on raw compute cost. However, the true cost of Vultr includes add-ons that are baked into DigitalOcean’s base pricing: DDoS protection, backups (20% of instance cost), and snapshots are all charged separately. Pricing also varies by region, which makes budgeting less predictable.
DigitalOcean uses flat, transparent pricing regardless of region. DDoS protection is included. A meaningful recent change: as of January 2026, DigitalOcean switched to per-second billing for Droplets — you only pay for the exact compute time used. This is particularly useful for CI/CD pipelines, auto-scaled workloads, and event-driven batch jobs where hourly billing previously meant paying for idle time. New accounts receive $200 in free credits valid for 60 days. Backups are still charged at 20% of instance cost.
One honest note: DigitalOcean’s base Droplet pricing is 2–3× higher than budget European providers like Hetzner for equivalent specs. If raw price-per-spec is your primary concern, both Vultr and Hetzner are worth considering alongside DigitalOcean. For help estimating costs, our DigitalOcean pricing guide and DigitalOcean pricing calculator can help.
Winner: Vultr for entry-level and budget-conscious builds. DigitalOcean for pricing predictability and total cost of ownership when factoring in included services.
Support and Documentation
DigitalOcean offers 24/7 ticket support on all plans, paid support tiers with SLAs, and an unrivaled documentation library — 6,000+ tutorials covering everything from basic server setup to Kubernetes deployments and AI/ML workflows.
Vultr provides ticket-only support with a smaller documentation base. It’s capable, but noticeably less comprehensive than DigitalOcean for developers who need guidance.
Winner: DigitalOcean — particularly for teams that rely on documentation for onboarding or troubleshooting.
Best Use Cases
Choose DigitalOcean if you’re:
- Building or launching a SaaS, MVP, or web app with a small team
- A solo developer who wants managed services without sysadmin overhead
- Deploying AI-powered applications using the Gradient AI platform
- Running managed Kubernetes or databases without wanting to configure everything from scratch
- New to cloud hosting and relying on documentation to get up to speed
- Prioritizing predictable billing — especially with the new per-second billing model
Choose Vultr if you’re:
- Running Windows Server applications or need to upload a custom OS ISO
- Deploying to underserved global regions where DigitalOcean has no presence
- Building serious GPU/AI infrastructure — model training, high-volume inference, custom GPU clusters
- Optimizing for peak CPU or disk performance (gaming servers, web scraping, ML inference)
- Managing your own infrastructure stack and comfortable without managed services
- Running a tight budget and willing to configure extras like DDoS protection manually
How We Evaluated These Platforms
This comparison draws on official documentation and pricing pages from Vultr (vultr.com/pricing) and DigitalOcean (digitalocean.com), independent benchmark reviews, and recent product announcements from both companies. Pricing and feature details were verified in April 2026. Both platforms evolve quickly — check official pricing pages before provisioning.
Frequently Asked Questions
Can I host a Windows app on DigitalOcean?
No. DigitalOcean only supports Linux distributions. If you need Windows Server, Vultr is the better choice — it supports Windows and custom ISO uploads.
Which is faster — Vultr or DigitalOcean?
Vultr’s High Frequency Compute and VX1 instances are faster for CPU and disk-intensive tasks. For typical web app workloads, DigitalOcean performs consistently well and the practical difference is minimal.
Do both platforms support GPUs and AI workloads?
Yes, both do now. Vultr offers a broader range of GPU hardware (NVIDIA and AMD, from A100s to Blackwell Ultra) and Serverless Inference. DigitalOcean offers GPU Droplets and the Gradient AI Platform for building and deploying AI-powered applications within its managed ecosystem. For dedicated, high-volume AI compute, Vultr has more options. For integrating AI into a DO-hosted stack, Gradient AI is a solid choice.
Which is more beginner-friendly?
DigitalOcean — by a clear margin. Its UI is cleaner, its documentation is deeper, its 1-Click Marketplace reduces setup time significantly, and its $200 free credit lets new users explore the platform without financial commitment.
Which has better pricing?
It depends what you’re optimizing for. Vultr’s entry-level VPS pricing is lower, and its VX1 tier offers strong price-to-performance. DigitalOcean’s pricing is higher per instance but includes DDoS protection, flat regional pricing, and now per-second billing. For predictable SaaS budgets, DigitalOcean wins. For maximum compute per dollar, Vultr (or European alternatives like Hetzner) may be better.
What about DigitalOcean’s App Platform vs. just using Droplets?
App Platform is DigitalOcean’s PaaS layer — it deploys code directly from GitHub with SSL, CDN, and auto-scaling handled automatically. It’s comparable to Heroku or Render in experience. If you want to skip server management entirely, App Platform is worth considering. See our Heroku vs DigitalOcean comparison for a deeper look at managed versus self-managed approaches.
Final Verdict
DigitalOcean is the right choice for the majority of developers: teams building SaaS products, startups launching MVPs, solo developers who want managed services, and anyone prioritizing documentation and ease of setup over raw infrastructure flexibility. The addition of per-second billing, GPU Droplets, and the Gradient AI Platform makes it more competitive than ever at every layer of the stack.
Vultr earns its place for power users who need Windows support, maximum performance per dollar, bare metal GPU compute, or deployment in global regions DigitalOcean doesn’t cover. Its new VX1 tier also makes it genuinely compelling for cost-sensitive compute-heavy workloads.
For broader cloud comparisons, see our guides on DigitalOcean vs AWS, DigitalOcean vs Linode, and DigitalOcean pricing.
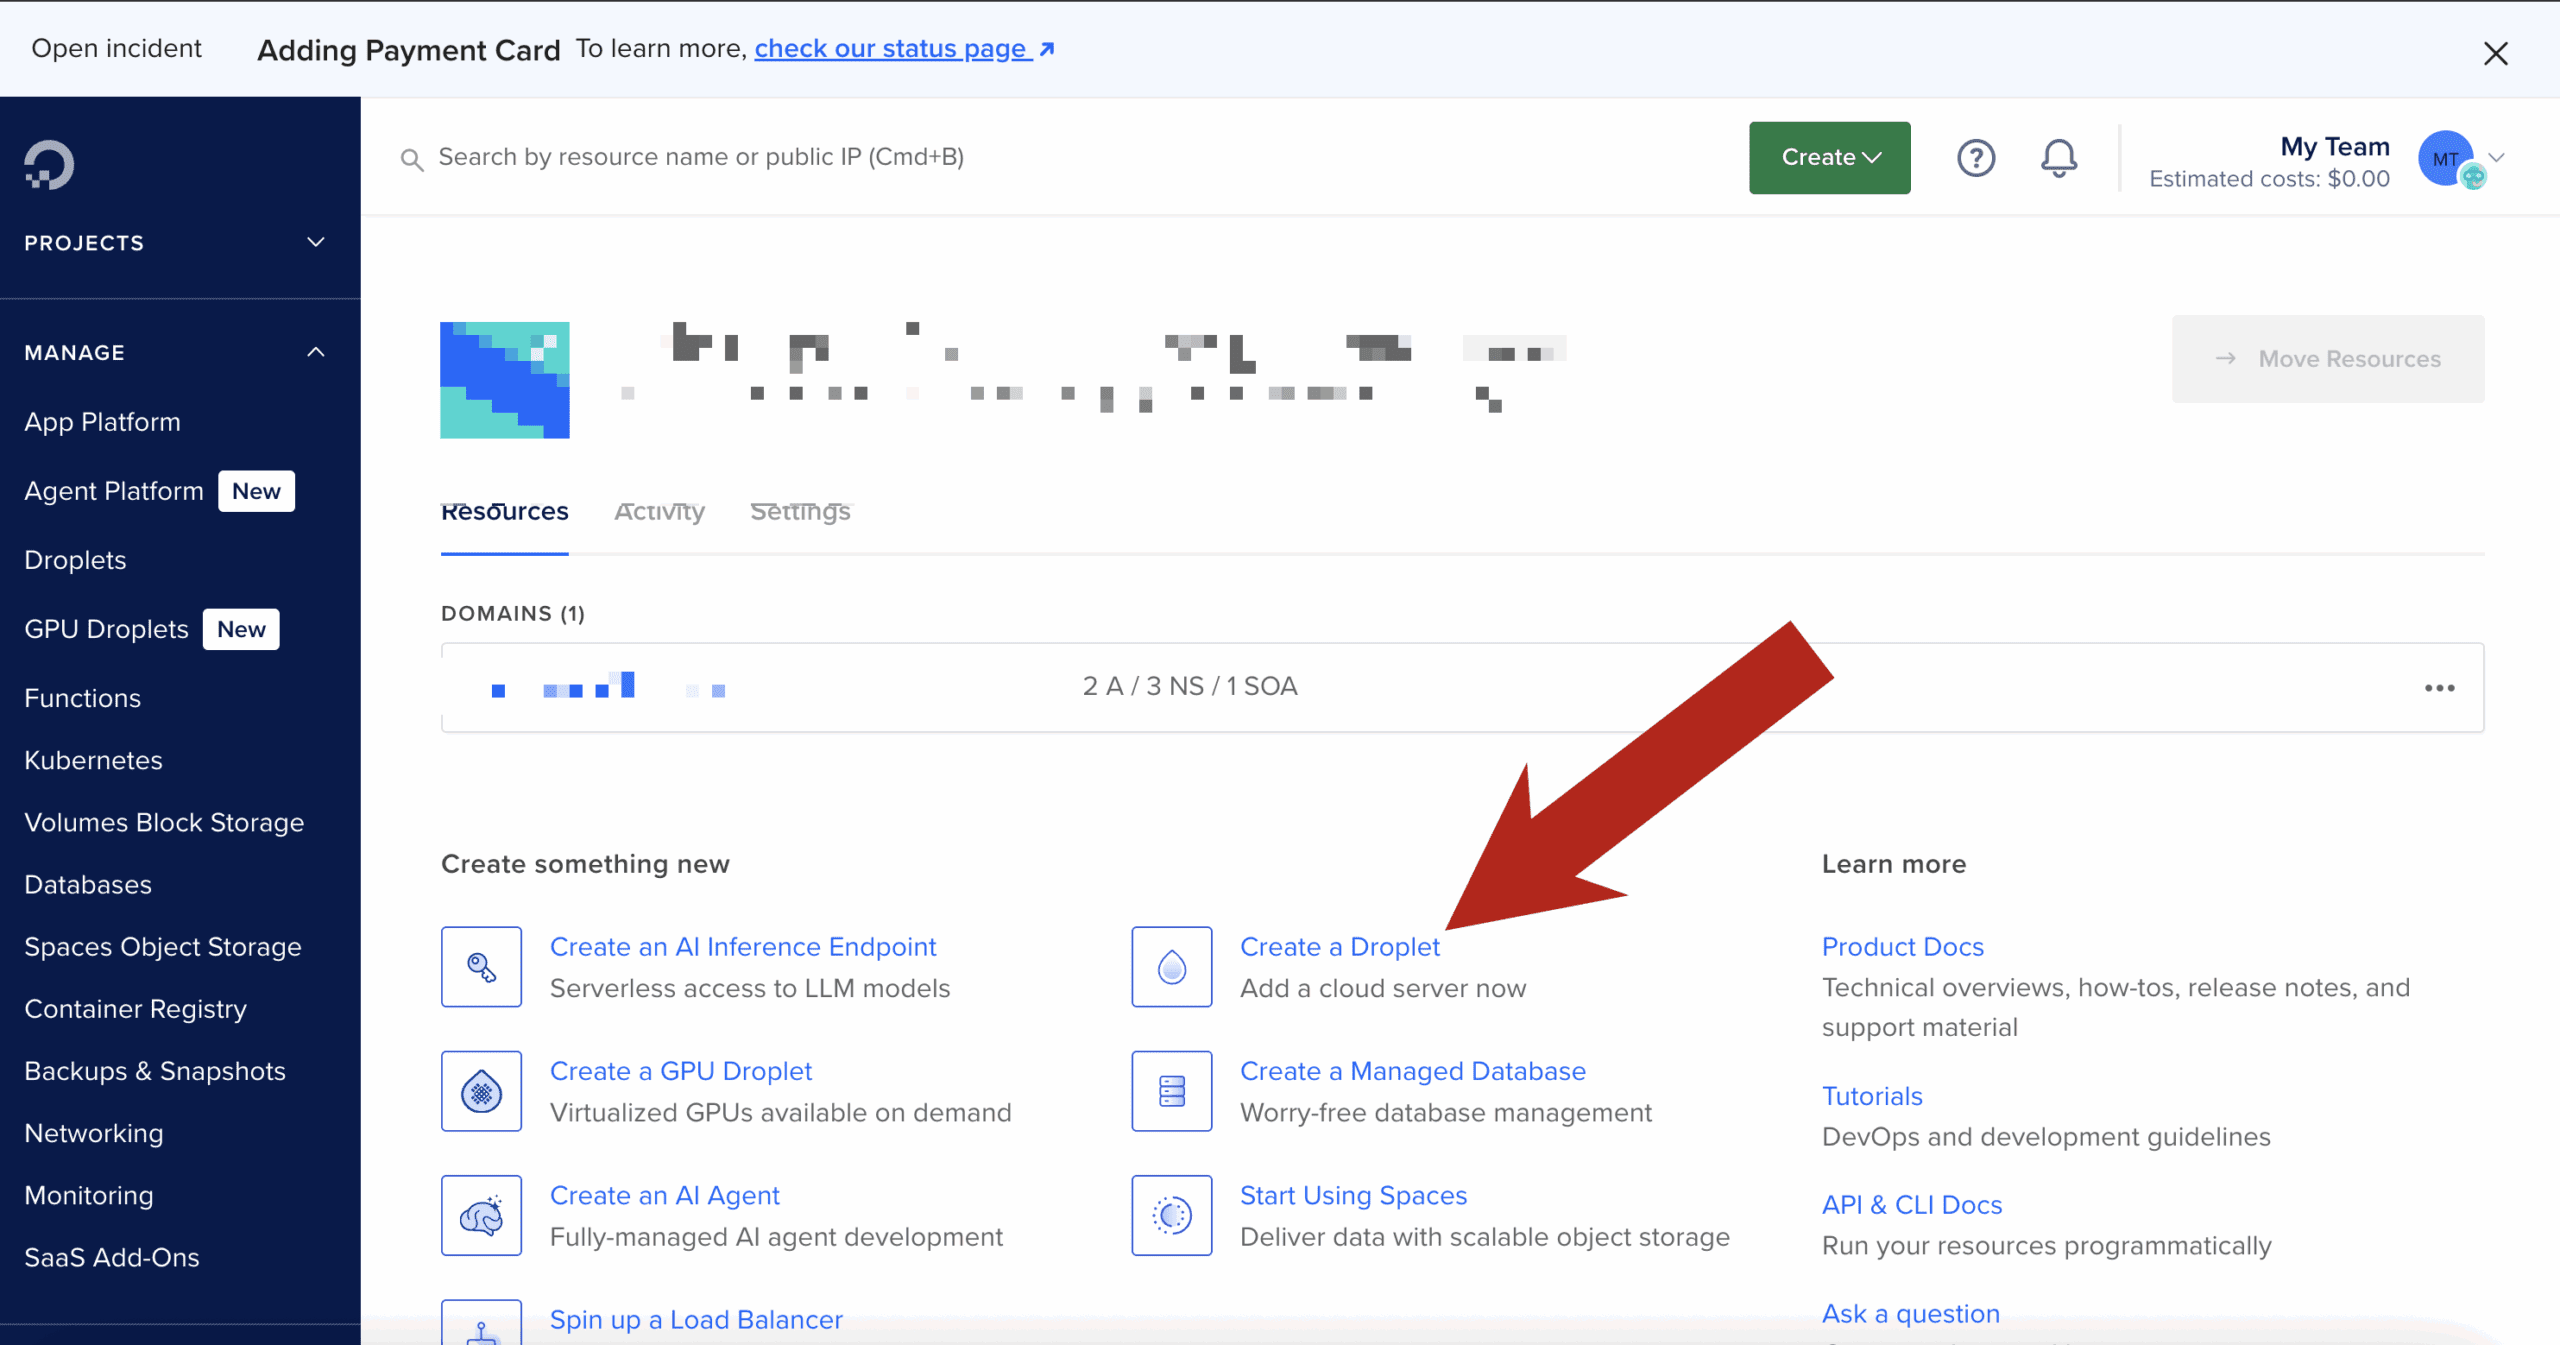
How to Create a DigitalOcean Droplet (Step-by-Step Guide for Beginners)
I used to think cloud servers were only for developers or IT pros. But last week, I launched my own DigitalOcean Droplet—and it took less than a minute. I have limited experience with Linux servers beyond basic hosting—and yet here I am, running my own virtual server with full root access.
In this post, I’ll walk you through exactly how I did it, step by step. Whether you’re launching a website, hosting a web app, or just want to learn something new, you can do this too.
What Is a DigitalOcean Droplet?
Think of a Droplet as your own personal computer in the cloud. It’s a virtual private server (VPS) that you can use for nearly anything:
- Hosting websites and blogs
- Running apps like Node.js, Flask, or Django
- Learning Linux commands hands-on
- Setting up game servers or dev environments
Unlike shared hosting, you get total control, higher speed, and better scalability.
Why I Chose DigitalOcean
I compared several VPS providers, but DigitalOcean stood out:
- Fast setup: You can literally launch a Droplet in under 60 seconds.
- Affordable: Plans start at just $5/month. Click here to try our DigitalOcean pricing calculator.
- Developer-friendly: Clean UI and helpful documentation.
- Free trial: They give you $100 in credits to get started.
Plus, the experience felt tailored for beginners. I didn’t feel lost at any point.
Want $200 DigitalOcean Credit? Claim It Here
Step-by-Step: How I Launched a Droplet in 60 Seconds
Here’s the exact process I followed:
1. Sign up for DigitalOcean
Visit digitalocean.com and create an account. You’ll get a $100 credit for 60 days if you’re new.
2. Click “Create Droplet”
After logging in, click the “Create” button in the upper-right and select “Droplet.”
3. Choose an Image
I chose Ubuntu 22.04 LTS — it’s stable, well-supported, and beginner-friendly.
4. Select a Plan
I picked the Basic Shared CPU plan with 1GB RAM. It only costs $5/month and is perfect for learning and small projects.
5. Choose a Data Center
I selected a region close to me (New York) to ensure fast response times.
6. Authentication
You can use an SSH key or a root password. I used an SSH key—DigitalOcean helps you generate one during setup if needed.
7. Name Your Droplet and Launch
I gave my Droplet a simple name: first-droplet. Then I hit “Create Droplet.”
That’s it. Within 60 seconds, my server was live and ready to go.
What Happened Next
DigitalOcean immediately gave me an IP address. I opened my terminal and logged in:
ssh root@your_droplet_ipBoom. I was inside my server. I felt like a real developer—even though I was just following instructions.
I had full root access and could do anything: install Nginx, set up a database, host files—you name it.
What You Can Do With Your Droplet
Here are a few things you can try right after creating your server:
- Install a Web Server: Nginx or Apache
- Host a Website or Blog: Use WordPress or a static site generator
- Set Up a Domain Name: Point your domain to your droplet’s IP
- Install SSL: Use Let’s Encrypt for a free HTTPS certificate
Need help with these steps? DigitalOcean’s tutorials are excellent.
Bonus Tips for Beginners
- Use UFW firewall:
ufw allow OpenSSH ufw enable - Take snapshots: Back up your Droplet before making big changes.
- Use Cloudflare: For DNS, CDN, and DDoS protection.
- Create a non-root user: For safer long-term server usage.
Final Thoughts
If I can do it in 60 seconds with no prior server experience, you absolutely can too.
Whether you’re launching your first website or building the foundation for your next big project, a DigitalOcean Droplet gives you control, flexibility, and speed.
👉 Learn more here and get some low cost credits to try it out.
How to Build a Fast, Free API Proxy That Just Works (Using Cloudflare Workers)
Tired of hitting CORS errors when trying to fetch data in the browser? Want to keep your API keys safe and stop spinning up full backend servers just to call an endpoint?
You’re not alone. And the good news is: you don’t need a traditional backend to solve these problems.
With Cloudflare Workers, you can create a fast, secure, and completely free API proxy that just works—in minutes. Whether you’re building a side project, hacking together automations, or launching a full-on SaaS, this is a game-changer.
Let’s walk through it step-by-step.
🌐 What Is a Cloudflare Worker (and Why It’s Perfect for Proxies)
Cloudflare Workers are serverless functions that run on Cloudflare’s global edge network. That means:
- No server setup
- Insanely fast performance (close to the user)
- Free tier with generous limits
- Great for simple API calls, proxies, and automations
In short: the perfect place to drop in a fast, secure API proxy.
🔨 When and Why to Use an API Proxy
Here’s when a proxy helps:
- ✅ Bypass CORS issues when making requests from the browser
- ✅ Hide secret API keys from frontend code
- ✅ Modify requests or responses (add headers, reformat JSON)
- ✅ Chain multiple API calls behind one endpoint
- ✅ Add logging, rate limits, or authentication
If you’re building in Replit, Vercel, Netlify, or just don’t want a backend—this is for you.
💪 Step-by-Step: Build Your Proxy in 10 Minutes
🚀 Step 1: Set Up Your Cloudflare Account
- Visit workers.cloudflare.com
- Create a free account
🔧 Step 2: Install Wrangler (CLI Tool)
npm install -g wrangler
wrangler login
🔺 Step 3: Generate a New Project
wrangler init my-api-proxyChoose “yes” to the default TypeScript/JavaScript template.
🧠 Step 4: Add Proxy Logic (src/index.js or src/index.ts)
Replace the contents with this basic proxy example:
export default {
  async fetch(request) {
    const apiUrl = 'https://api.openai.com/v1/chat/completions';

    const body = await request.text();
    const response = await fetch(apiUrl, {
      method: 'POST',
      headers: {
        'Authorization': `Bearer ${OPENAI_KEY}`,
        'Content-Type': 'application/json',
      },
      body
    });

    return new Response(await response.text(), {
      status: response.status,
      headers: { 'Content-Type': 'application/json' },
    });
  }
}
🔐 Step 5: Secure Your API Key
In your wrangler.toml, add:
[vars]
OPENAI_KEY = "sk-xxxxxxxxxxxxxxxx"
Cloudflare will inject this as a secure environment variable.
🌎 Step 6: Deploy Your Worker
wrangler deployDone! You’ll get a live URL like:
https://my-api-proxy.your-namespace.workers.dev📁 How to Use the Proxy in Your Frontend
Now that your proxy is live, you can call it like this:
const res = await fetch('https://my-api-proxy.workers.dev', {
  method: 'POST',
  headers: { 'Content-Type': 'application/json' },
  body: JSON.stringify({
    model: "gpt-3.5-turbo",
    messages: [{ role: "user", content: "Hello!" }],
  })
});
const data = await res.json();
No CORS error. No key leakage. Just clean responses.
🧰 Power Features to Add Later
- ✅ Query param passthrough
- ✅ Auth/token checks
- ✅ Rate limiting (per IP or header)
- ✅ KV storage or caching
- ✅ Support multiple APIs with route matching
You can also handle GET, PUT, etc., and validate payloads as needed.
📅 Free Tier Limits to Know
Cloudflare Workers’ free plan includes:
- 100,000 requests/day
- 1,000 scripts per account
- 10ms CPU time/request
That’s more than enough for indie projects, demos, and MVPs.
✅ Conclusion: Start Proxing Like a Pro
With just a few lines of code, you’ve built a:
- Globally distributed API proxy
- That hides secrets
- Beats CORS
- Runs for free
No server required.
Now you can safely call third-party APIs from your frontend, automation tools, or no-code platforms without compromise.
From CORS Errors to Superpowers: Why API Proxies Are a Must for Modern Coders
The Unexpected Hero of Your Stack
You’re finally vibing in the zone, remixing APIs and building your next great tool. You wire up your fetch request, hit save, and boom: CORS error.
It happens to all of us. Whether you’re shipping a side project on Replit, connecting OpenAI to a frontend on Vercel, or just trying to make your Supabase dashboard more dynamic, the browser slams on the brakes. Between CORS issues and secret key exposure, you start wondering: is there a better way?
There is. It’s called an API proxy.
This guide shows you how a simple API proxy can unlock faster builds, safer code, and more flexible integrations. Let’s turn your pain into power.
1. The CORS Wall: Why Browsers Block You
CORS (Cross-Origin Resource Sharing) is a security feature built into browsers. It prevents a script running on yourdomain.com from making requests to otherdomain.com unless the response explicitly says it’s allowed.
This is great for preventing malicious websites from hijacking sessions. But for indie devs and vibe coders? It can break your flow fast.
APIs like OpenAI, Notion, or even custom backends often don’t return the right CORS headers for frontend calls. Your app crashes before it even gets the data.
2. API Keys and Secrets: What Not to Expose
If you’re coding in the browser or deploying a frontend-only site, never include your secret API keys. Anyone can open DevTools and grab them.
Examples:
- Stripe secret key
- Firebase admin credentials
- OpenAI API key
Once exposed, those keys can be abused or blacklisted, potentially costing you money or breaking your app.
API proxies solve this. They live server-side and inject your credentials securely, hidden from the public.
3. What an API Proxy Actually Does
Here’s how a typical proxy works:
- The browser sends a request to your proxy (e.g.
/api/weather) - Your proxy adds headers, keys, or formatting
- It relays the request to the actual API (e.g. OpenWeatherMap)
- It receives the response
- It optionally filters, reformats, or caches it
- It sends the safe, clean response back to your frontend
It acts as a translator, gatekeeper, and security guard—all in one.
4. Superpowers You Get with an API Proxy
- ✨ Bypass CORS: Make API requests without running into browser restrictions
- 🔒 Hide API Keys: Keep sensitive secrets secure on the server
- 🔀 Reformat Responses: Clean or simplify data before it reaches the client
- 🌐 Unify APIs: Combine multiple external APIs into one simplified endpoint
- ⌛ Add Caching: Reduce API calls and improve response times
- 🚧 Gate Access: Require authentication or tokens before calling APIs
- 🔮 Mock or Debug: Inject test data or log calls during development
5. Real Use Cases from Vibe Coders
- OpenAI Chatbot on Replit: Proxy intercepts frontend messages, appends API key, and returns responses
- n8n Webhook Automation: Proxy receives external webhook, validates payload, and routes to n8n
- Frontend Dashboard: Calls a proxy endpoint that combines Supabase data + Stripe subscription info
These keep the frontend light and secure, while unlocking flexibility that wouldn’t be possible with direct API calls.
6. How to Set One Up (Without Hating Backends)
You can build an API proxy in minutes using almost any tech stack:
- Node.js Express
app.post('/api/proxy', async (req, res) => {
  const response = await fetch('https://api.example.com/data', {
    method: 'POST',
    headers: {
      'Authorization': `Bearer ${process.env.SECRET_KEY}`,
      'Content-Type': 'application/json'
    },
    body: JSON.stringify(req.body)
  });
  const data = await response.json();
  res.json(data);
});
- Cloudflare Workers
- Netlify Functions
- Firebase Cloud Functions
- PHP or Python Flask (if you’re old-school or fast hacking)
There are even tools like Hop, Railway, or Fly.io that let you deploy lightweight proxies with minimal setup.
Final Thoughts: Build Fast, Stay Safe
An API proxy isn’t just a fix—it’s an upgrade.
It frees you to code in the browser, remix APIs, and ship public demos without worrying about security or structure. It helps you build smarter and scale later.
If you’re a modern coder who likes to move fast and build beautifully, it’s time to add a proxy to your stack.
Click here if you want to learn how to set up an API Proxy using free Cloudflare Workers.
Want a plug-and-play proxy starter? Drop your stack and I’ll send over a GitHub link.
Is Your Open Source Project at Risk? How OpenSSF’s Scorecard Exposes Hidden Security Flaws
Open source is everywhere—fueling apps, businesses, and even government systems. But is the code you rely on really secure? Recent security headlines have shown that even the most popular open source projects can hide dangerous flaws. That’s where OpenSSF’s Scorecard comes in. Think of it as a free, automated security checkup that can reveal problems before they become your next big headache. Here’s how it works—and why every maintainer and user should care.
Why Security in Open Source Matters More Than Ever
Major breaches like Log4j and SolarWinds have proven one thing: supply chain attacks can strike anyone, anywhere. Every time you include a new dependency or use open source libraries, you inherit not just their features, but their vulnerabilities. Even small weaknesses—like missing security policies or outdated dependencies—can open the door for attackers. The stakes are higher than ever, and “trust but verify” is the new rule.
What is the OpenSSF Scorecard?
The Open Source Security Foundation (OpenSSF) is an industry-backed group dedicated to making open source safer for everyone. Their Scorecard tool scans public repositories and provides an instant, easy-to-understand assessment of project security health. Backed by major companies like Google, GitHub, and Microsoft, Scorecard helps maintainers and users alike spot risks, fix problems, and build trust.
How Does Scorecard Work?
Scorecard performs dozens of automated security checks on your repository. Here’s how the process works:
- Scan: You run Scorecard (manually, via CLI, or with GitHub Actions) on any public repo.
- Checks: Scorecard reviews policies, code review settings, dependency management, branch protection, and more.
- Report: It generates a detailed score (0–10) with pass/fail and improvement suggestions for each check.
- Action: Maintainers (and users!) can review, fix, and monitor project security posture over time.
Scorecard Checks: What Gets Scored?
| Check | What It Looks For | Why It Matters | Pass/Fail Example |
|---|---|---|---|
| Code-Review | Are pull requests required and reviewed before merging? | Prevents unauthorized or malicious code changes | Pass: All PRs require review. Fail: Direct pushes allowed. |
| Branch Protection | Is the main branch protected from force pushes or deletions? | Prevents accidental or malicious changes to critical code | Pass: Protection enabled. Fail: Anyone can force-push. |
| Dependency Update Tool | Is there automation for updating dependencies? | Keeps your code safe from outdated/vulnerable packages | Pass: Dependabot enabled. Fail: Manual, infrequent updates. |
| Vulnerability Disclosure | Is there a documented process for reporting vulnerabilities? | Helps the community fix problems quickly and responsibly | Pass: SECURITY.md present. Fail: No disclosure info. |
| Binary-Artifacts | Does the repo avoid committing binary files (e.g., .exe)? | Reduces risk of hidden malware in the codebase | Pass: Only source code. Fail: Executables in repo. |
| Fuzzing/Static Analysis | Does the project use tools to find bugs automatically? | Catches security and stability issues early | Pass: Automated bug checks. Fail: None in place. |
Real-World Impact: Why This Matters
Scorecard’s checks aren’t just for show—they’re already helping major companies and open source maintainers secure their code. With supply chain attacks on the rise, automating these checks is quickly becoming the industry norm. By running Scorecard, you’re not just protecting your own project—you’re helping secure the entire open source ecosystem.
How to Run Scorecard On Your Project
- Install or access Scorecard (from the OpenSSF GitHub or as a GitHub Action).
- Point it at your public repo. Run from the command line or automate in your CI/CD pipeline.
- Get your numeric score and detailed report, including suggestions for each failing check.
- Take action! Improve your score by following the recommendations, then re-scan as needed.
A strong Scorecard not only makes your project safer, but also builds trust with users, contributors, and businesses.
Scorecard Success Stories
OpenSSF Scorecard is used by thousands of maintainers and some of the world’s biggest companies to track, improve, and showcase open source security. Projects with high scores are more likely to attract contributors and enterprise adoption. Public results and badges give everyone more confidence in the health of your repo.
FAQs: What Every Maintainer and Developer Should Know
Who can use Scorecard?
Anyone with access to a public repository can run Scorecard. It’s free and open source.
Does a low score mean my project is unsafe?
Not always, but it means there are areas for improvement. Treat it as an opportunity to level up your security.
Can I automate Scorecard checks?
Yes! Add Scorecard to your CI/CD pipeline or as a GitHub Action for ongoing monitoring.
Conclusion & Call to Action
Don’t wait for your open source project to make security headlines for the wrong reasons. Take a proactive approach—run OpenSSF Scorecard, fix what’s flagged, and show your commitment to safe, trustworthy code. Ready to check your repo? Try Scorecard today and see where you stand!
Additional Resources
JavaScript Malware – How to Spot, Prevent, and Survive Modern Web Exploits
JavaScript powers almost everything on the modern web—from simple forms to advanced applications. This same flexibility also means more opportunities for bad actors to cause problems. Web-based threats and software supply chain issues are more advanced and damaging than ever. Whether you’re a developer, site owner, or security lead, understanding and preventing these risks is essential for keeping your site and users safe.
How JavaScript Security Threats Have Changed
Web-based risks aren’t just about annoying pop-ups anymore. Now, malicious code can arrive through unexpected sources—NPM packages, plugins, external scripts, and advertising networks. Incidents in 2024 and 2025 showed that even trusted sources can be targeted, so everyone needs to be vigilant.
Common JavaScript Security Issues & Risks
| Risk Type | What Can Happen | How It Gets Introduced | Warning Signs | How to Prevent |
|---|---|---|---|---|
| Dependency Confusion | Unexpected code added to your build or project | A public package with the same name as a private/internal one | Unexpected changes during install or build | Use scoped/private packages; check all dependencies |
| Typosquatting | Unintended or unwanted code installed | A package name very similar to a trusted one | Unfamiliar packages or names in your dependency tree | Double-check package names before install; use monitoring tools |
| Unauthorized Package Changes | Unexpected new features or settings in a known package | Account or project access not properly secured | Surprise version updates or settings changes | Enable 2FA for maintainers; monitor update logs |
| Web Skimming Scripts | Personal or payment info could be sent to unknown parties | Injected code via plugins, external scripts, or CDNs | Unexpected script behavior or modified web forms | Use SRI, CSP, and host key scripts yourself |
| Untrusted Third-Party Scripts | Webpage behavior changes, user complaints, or warnings | External ad networks or widgets | Browser or security tool warnings | Vet sources; limit third-party scripts |
| Cross-Site Scripting (XSS) | Unexpected website actions or pop-ups | User input not properly checked or displayed | Odd website behavior or session changes | Sanitize inputs and outputs; use CSP |
| Unusual Clipboard or Credential Activity | Unexpected data changes or access attempts | Untrusted extensions, browser add-ons, or injected scripts | User reports of clipboard or login issues | Review extensions; limit permissions; monitor scripts |
| Fileless/Memory-Only Scripts | Performance or stability issues on site or app | Complex or heavily hidden code, drive-by downloads | Sudden slowness or crashes | Keep software updated; regularly audit code and scripts |
Why These Issues Are Serious
Modern JavaScript problems aren’t just annoying—they can impact privacy, security, and business operations. Problems can arrive through new dependencies, code copied from public sources, or changes made by external parties. Keeping everything up to date and closely monitored is more important than ever.
How to Protect Yourself, Your Team, and Your Users
- Check every dependency with tools like Socket.dev, Snyk, or Dependabot
- Use lockfiles and review your dependency tree
- Implement Content Security Policy (CSP) and Subresource Integrity (SRI)
- Limit third-party scripts and plugins—host your own whenever possible
- Require two-factor authentication for maintainers and restrict publishing rights
- Keep browsers, your operating system, and Node.js updated
- Listen to user complaints or odd website behavior
- Regularly educate your team on social engineering and online threats
Recent Lessons Learned
– 2024: A popular NPM package saw unexpected changes after a maintainer’s account was not properly secured. Unwanted code was added to thousands of apps.
– 2025: E-commerce platforms found external scripts that sent checkout information off-site. Fixes included better plugin monitoring and hosting their own scripts.
– Lesson: Good security means continuous monitoring and never assuming a dependency or script will always be safe.
Actionable Checklist: What To Do Right Now
- Audit all project dependencies—remove what you don’t use
- Add supply chain monitoring tools to your project
- Review all external scripts and plugins on your site
- Enable alerts for dependency or script changes
- Update your incident response plan and keep it current
- Stay up to date on security news and best practices
Frequently Asked Questions
How do I know if something is wrong with my project?
Look for unexpected updates, strange behavior, or user complaints. Automated scans and regular reviews help spot problems early.
What’s the difference between XSS and supply chain problems?
XSS is about user input causing problems on your site. Supply chain issues arrive through dependencies or third-party code—even before your own code runs.
Can browser extensions be a problem?
Yes. Poorly vetted extensions can cause the same issues as risky website code. Only use trusted, essential extensions.
How do I keep my team aware of these risks?
Share guides like this, offer regular security training, and discuss recent examples as part of your workflow.
Conclusion & Resources
Web security is always changing, but staying informed and keeping up with best practices makes a huge difference. Make it a habit to check dependencies, monitor scripts, and keep learning.
Helpful links:
Python Security Risks Every Developer Should Know
Python powers everything from hobby projects to critical business systems. Its popularity means even small security mistakes can have a big impact. This guide draws on real developer experience and current best practices to help you spot, understand, and fix the most important security risks in Python projects.
Why Security Matters in Python Projects
Python’s flexibility and vast package ecosystem make it easy to build fast, but also easy to overlook security. Many security breaches happen not from complex attacks, but from basic oversights—outdated dependencies, unchecked user input, or misconfigured settings. Developers and teams that invest in security not only protect their users, but also build trust and safeguard their own reputations.
The Top Python Security Risks (With Expert Tips)
1. Dynamic Code Execution
Risk: Features that evaluate or execute code (such as certain built-in functions) can be abused if not tightly controlled.
Expert Tip: Never process user input using functions that execute code. Use safer alternatives for data processing and always validate input.
2. Unsafe Data Loading
Risk: Loading data with methods that can also run code is dangerous if the data comes from outside your application.
Expert Tip: Always choose “safe mode” or well-supported libraries for loading data. Avoid methods that are known to execute code from files or strings.
3. Insecure Dependencies
Risk: Using packages from untrusted or unmaintained sources can introduce hidden vulnerabilities or malicious code.
Expert Tip: Audit your dependencies regularly. Use trusted tools and official repositories, and check package activity and support history before adding new dependencies.
4. Improper Input Validation
Risk: Unchecked or unsanitized input can lead to unexpected behavior, including unauthorized access or file manipulation.
Expert Tip: Always validate input for type, length, and format. Use built-in validators or libraries where possible.
5. Insecure File Handling
Risk: Allowing users to upload or specify files without restrictions can expose your system to attacks.
Expert Tip: Limit file uploads to specific directories, check file types, and sanitize file names. Never reveal internal file structures to users.
6. Exposed Credentials and Secrets
Risk: Storing passwords, API keys, or tokens directly in code risks accidental leaks and unauthorized access.
Expert Tip: Use environment variables or managed secret storage. Rotate secrets regularly and never commit them to version control.
7. Unsafe Use of System Commands
Risk: Running operating system commands with user-provided data can allow attackers to control your system.
Expert Tip: Avoid executing system commands with user input. When necessary, use safe argument lists rather than command strings, and limit permissions.
8. Web Application Risks
Risk: Web apps are exposed to threats like cross-site scripting and request forgery.
Expert Tip: Always enable and correctly configure your framework’s security features, such as XSS and CSRF protection. Never disable these for convenience.
9. Default Configurations and Debug Modes
Risk: Leaving debug mode or default admin settings on in production exposes sensitive information.
Expert Tip: Always review your production environment settings, disable debug features, and use strong, unique admin credentials.
10. Outdated Software
Risk: Old versions of Python or packages often have known security issues.
Expert Tip: Regularly update Python and all dependencies. Use automated tools to monitor for security patches.
Python Security Risks: Comparison Table
| Risk | What Can Happen | Example Scenario | Prevention / Best Practice |
|---|---|---|---|
| Dynamic Code Execution | Attackers run arbitrary code, access files, or take control of your app | Using dynamic evaluation with user input | Never evaluate code from user input; use safe parsing |
| Unsafe Data Loading | Hidden code executes when loading data, compromising the system | Loading untrusted data with unsafe methods | Use safe formats like JSON; safe_load for YAML |
| Insecure Dependencies | Malicious code, outdated vulnerabilities, or backdoors added to your app | Installing packages from unknown sources | Audit and update dependencies; use trusted sources |
| Improper Input Validation | Attackers manipulate files, inject commands, or bypass authentication | File upload without validation | Strictly validate all user input |
| Insecure File Handling | Sensitive files are read, overwritten, or exposed | User uploads with directory traversal | Restrict paths, check file types/names |
| Exposed Credentials/Secrets | Passwords, API keys, or tokens are leaked or abused | Committing secrets to source code | Use environment variables or a secrets manager |
| Unsafe OS Commands | Unintended system commands are executed | Passing user input to system shell | Use argument lists; never execute user input directly |
| Web App Risks (XSS, CSRF) | Unauthorized actions or data theft | Disabling CSRF protection in Flask/Django | Enable framework security features by default |
| Default Configurations | Debug info, admin interfaces, or weak credentials left open to the public | Debug mode enabled in production | Harden all production settings; restrict admin access |
| Outdated Software | Exploits through known vulnerabilities | Using old Python or libraries | Regularly update Python and all packages |
How to Protect Your Python Projects (Actionable Checklist)
- Validate and sanitize all input.
- Avoid executing or evaluating code from untrusted sources.
- Use secure libraries and audit dependencies.
- Store sensitive information securely, never in code.
- Carefully manage file uploads and access.
- Use framework security features and keep them enabled.
- Update Python and packages regularly.
- Automate security checks in your development workflow.
Real-World Perspective
Security is an ongoing process, not a one-time checklist. Teams that share responsibility, stay informed about new threats, and invest in regular reviews are less likely to be caught off guard. Security-minded developers routinely run code analysis, attend relevant trainings, and follow trustworthy resources like OWASP and Python’s official documentation.
Oh and this one is for fun, Stop Using list.index(): The Safe Way to Find Strings in Python Lists
FAQ: Python Security for Developers
Is Python insecure by default?
No—Python is secure when used properly, but unsafe code or dependencies can introduce risks.
Are some data loading methods more dangerous?
Yes. Only load data using “safe mode” options or trusted libraries. Always avoid code execution from untrusted sources.
How can I check my dependencies?
Use tools like Bandit, Safety, and pip-audit, and prefer well-supported packages.
How do I protect sensitive information?
Store secrets in environment variables or a secret manager, never in code or repositories.
What’s the best way to stay secure as Python evolves?
Keep learning, stay current with updates and best practices, and use automated tools to monitor for issues.
Conclusion
Trust and safety are at the heart of good software. By following the expert-backed steps above, you can secure your Python projects, protect your users, and earn the confidence of your community. Make security part of your workflow, not an afterthought.
Understanding and Preventing CSS Vulnerabilities in Modern Web Development
Most developers think of CSS as “just for design,” but it can be a source of subtle security issues. Understanding CSS vulnerabilities helps you keep both your users and your site safe.
What Are CSS Vulnerabilities?
CSS vulnerabilities are weaknesses that arise when CSS is handled in ways that let attackers manipulate how a site looks, leak information, or even support more serious attacks. While CSS isn’t a programming language, it can still be abused, especially when user input is involved in dynamic styles or theming.
Types of CSS Vulnerabilities
CSS Injection:
If user data is placed into dynamic style rules or attributes without checks, attackers can change appearance or sometimes leak information.
Data Leaks via CSS:
Advanced CSS tricks can sometimes reveal private data, such as which links a user has visited or what values a form has autofilled.
Clickjacking:
CSS can be used to make hidden overlays, causing users to click buttons or links they never see.
Information Disclosure:
With certain selectors or features, attackers can sometimes infer private info from the way the site looks or reacts.
How Do CSS Vulnerabilities Occur?
-
Allowing unchecked user input to influence styles (such as color or class).
-
Letting users upload or insert raw CSS or SVG files.
-
Dynamically generating styles with user-controlled values.
Real-World Examples
-
Attackers have used advanced selectors to check which social links a user has visited.
-
Researchers have found ways to reveal autofilled values or profile details using CSS-only tricks (mostly patched in modern browsers).
How to Prevent CSS Vulnerabilities
-
Always validate user input that’s used for styles. Only allow safe, known values (like a set list of colors).
-
Never let users insert raw CSS or upload files that can include CSS (like SVGs) without sanitizing them.
-
Use a Content Security Policy (CSP) to limit where styles can come from and block inline or external styles when possible.
-
Be careful with themes and customizations—use drop-downs or color pickers rather than free-form inputs.
Testing and Detection
-
Review your code for places where user input affects styles, classes, or IDs.
-
Use browser security tools and static code analyzers.
-
When in doubt, ask a colleague to review dynamic styling logic for edge cases.
Frequently Asked Questions
Can CSS steal user data?
Not directly, but it can be used for tricks to infer info in some situations.
Do frameworks (React, Vue, etc.) help?
They’re safer, but if you insert unchecked input into style props or dangerously set HTML, there’s still a risk.
Are these issues patched by browsers?
Many have been, but you shouldn’t rely on the browser alone—always sanitize and validate input.
Conclusion
CSS isn’t usually the first thing people think of when it comes to website security, but ignoring it is risky. Taking a few precautions and knowing the basics of how attackers might use CSS will help keep your users and your code secure.
Unlock Explosive Growth: 7 AI Automation Platforms Revolutionizing Business Operations
In today’s ultra-competitive, fast-paced business world, the pressure to do more with less is relentless. Labor costs are rising, customer expectations are higher than ever, and companies are expected to scale without sacrificing quality. Enter AI process optimization: a game-changing approach that’s transforming how organizations operate—saving time, money, and a whole lot of headaches.
This guide spotlights seven cutting-edge AI automation platforms that are changing the game for AI process optimization. We’ll break down what makes each unique, highlight real-world use cases, and show you exactly how these tools can fuel explosive growth—no PhD in computer science required.
What Is AI Process Optimization?
AI process optimization means using artificial intelligence (AI) to streamline, automate, and improve the day-to-day workflows that keep your business running. Unlike old-school automation (which simply follows set rules), AI-powered tools can analyze data, adapt to new situations, and even make smart decisions on their own.
Why is AI process optimization different? It’s not just about doing things faster—it’s about doing them smarter, finding bottlenecks you never knew existed, and turning ordinary operations into scalable, intelligent systems that drive growth.
The end result? Less manual work, fewer errors, faster turnaround times, and new insights that were previously hidden in your business data—all thanks to AI process optimization.
What to Look For in an AI Process Optimization Platform
Not all platforms are created equal. Here’s what matters when choosing your AI process optimization stack:
- No-code/Low-code vs. Developer-Oriented: Do you want something anyone can use (no-code) or do you have technical staff ready to build custom solutions?
- Integration: How well does it connect with your existing software—CRMs, email, databases, cloud services?
- AI Capabilities: Does it have built-in AI tools (like chatbots, document analyzers, or machine learning)?
- Scalability & Cost: Can it grow with your business—and is pricing transparent?
- Security & Compliance: Does it meet your industry’s standards for data protection?
The 7 AI Automation Platforms Revolutionizing Business Operations
Below, we dive into each platform’s strengths, best use cases, and who it’s really for in the world of AI process optimization:
1. Intercom (AI Customer Support & Messaging)
- Best for: Businesses wanting smarter, more scalable customer support with AI process optimization at the core.
- Key AI Features: Fin AI Agent (automated chatbot), AI-powered ticket routing, and intelligent helpdesk automations.
- Integrations: Works with major CRMs, Slack, and custom APIs.
- AI Process Optimization Use Case: Instantly respond to common customer questions, escalate complex issues to the right agent, and collect valuable feedback 24/7—all while reducing support costs and optimizing service workflows.
2. Zapier (No-Code AI Workflow Automation)
- Best for: Anyone who wants to automate repetitive work without writing a single line of code, making AI process optimization accessible to all.
- Key AI Features: AI Copilot (builds automations from your prompts), 8,000+ app integrations, natural language workflow creation.
- Integrations: Google Workspace, Slack, HubSpot, OpenAI, and thousands more.
- AI Process Optimization Use Case: Auto-create leads from form fills, generate content with AI, and update spreadsheets—completely hands-off, freeing up time and resources for growth.
3. n8n (Open Source/Developer-Friendly Automation)
- Best for: Teams that want total control and are comfortable self-hosting their AI process optimization workflows.
- Key AI Features: Custom AI agent workflows, native support for OpenAI and other models, open-source flexibility.
- Integrations: 500+ native integrations, plus any API via HTTP requests.
- AI Process Optimization Use Case: Create complex multi-app automations, integrate AI into niche business tools, and keep sensitive data on your own servers for maximum flexibility and compliance.
4. UiPath (Enterprise RPA + AI)
- Best for: Enterprises with lots of legacy systems and strict process requirements seeking deep AI process optimization.
- Key AI Features: Robotic Process Automation (RPA), AI Center for custom model deployment, intelligent document processing.
- Integrations: Major ERPs, CRMs, finance and HR tools.
- AI Process Optimization Use Case: Automate invoice processing, employee onboarding, and compliance checks at scale, eliminating manual bottlenecks and boosting operational efficiency.
5. IBM watsonx Orchestrate (AI Agent Orchestration)
- Best for: Large organizations needing AI “agents” to handle routine tasks across departments and drive comprehensive AI process optimization.
- Key AI Features: No-code agent builder, prebuilt HR/sales/IT assistants, multi-agent workflow orchestration.
- Integrations: Connects with HRIS, CRMs, productivity tools, and IBM Watson services.
- AI Process Optimization Use Case: Automate recruiting, sales follow-ups, and internal helpdesk requests, ensuring business processes run seamlessly around the clock.
6. Microsoft Power Automate (Low-Code + AI)
- Best for: Companies invested in Microsoft 365 looking for fast, integrated AI process optimization solutions.
- Key AI Features: AI Builder (drag-and-drop ML), natural language flow design, RPA for desktop and cloud.
- Integrations: Office 365, Dynamics, Teams, SharePoint, and over 1,400 more.
- AI Process Optimization Use Case: Auto-approve invoices, extract data from emails, and keep teams in sync with automated alerts, streamlining business tasks at every level.
7. Apache Airflow (Open-Source Data & ML Pipelines)
- Best for: Data-driven companies needing to schedule and monitor complex workflows for AI process optimization.
- Key AI Features: Python-based workflow orchestration, supports ETL, ML pipeline automation.
- Integrations: AWS, GCP, Azure, databases, and more.
- AI Process Optimization Use Case: Automate nightly data reports, schedule retraining for ML models, and ensure reliability in data ops—making process optimization truly scalable.
Department-by-Department AI Process Optimization Use Cases
Customer Service: AI chatbots, smart ticket routing, auto-summarization of conversations (Intercom, Zendesk, n8n) optimize service workflows.
Marketing: Personalize campaigns, automate content generation, score and nurture leads (Zapier, HubSpot, Salesforce Einstein) for smarter marketing process optimization.
Sales: Lead scoring, pipeline forecasting, automated follow-ups (Salesforce, Microsoft Dynamics, Gong) enhance the sales process for better conversion.
Operations: Demand forecasting, predictive maintenance, inventory management (UiPath, IBM, Airflow) power robust operational process optimization.
HR: Resume screening, onboarding automation, employee FAQ bots (IBM watsonx Orchestrate, Workday) drive AI process optimization in people management.
IT/Engineering: Incident detection, AIOps, DevOps workflow automation (Airflow, n8n, ServiceNow) keep tech teams efficient and processes reliable.
How to Choose the Right AI Process Optimization Platform
- Assess Your Needs: Where do you lose the most time? What’s your biggest process bottleneck?
- Consider Skill Level: Do you have developers, or do you need something no-code?
- Integration: Make sure your must-have apps are supported out of the box.
- Scalability & Cost: Will the tool grow with you—and can you start free?
- Test & Iterate: Most platforms have free trials—try before you buy!
Real-World AI Process Optimization Success Stories
- E-commerce Brand: Used Intercom AI process optimization to cut average response times in half and improve customer satisfaction scores.
- Marketing Agency: Automated client onboarding with Zapier, saving 20+ hours a week through AI process optimization.
- SaaS Startup: Leveraged n8n for multi-step billing and notification flows, enabling lean operations with fewer staff thanks to process optimization.
Final Thoughts & Next Steps
AI process optimization isn’t just for tech giants. The tools are accessible, affordable, and proven to drive rapid ROI for businesses of all sizes. Whether you want to free up your team, slash costs, or scale faster, these seven platforms give you the power to act now.
Ready to unlock explosive growth with AI process optimization? Sign up for a free trial of one (or several!) of these platforms and start automating today. Have questions, or want tailored recommendations? Drop a comment or reach out!
FAQ
What’s the difference between RPA and AI process optimization?
- RPA (Robotic Process Automation) mimics human actions in software, following strict rules. AI process optimization uses machine learning and NLP to adapt and make smart decisions.
Do I need to be a programmer to use these AI process optimization tools?
- No! Platforms like Zapier and Intercom are built for everyone, while others like n8n or Airflow are better for developers.
Can these tools connect to my legacy software for AI process optimization?
- Most support integrations with both modern and legacy systems, either directly or via APIs.
Are there risks with AI process optimization?
- As with any tech, there are risks—data privacy, system errors, and over-automation. Always vet tools for compliance and start small.
What’s the best way to get started with AI process optimization?
- Identify a simple process to automate, try a free trial, and scale up as you see results.
Dockerizing Your Projects: The Ultimate Guide
Ever spent half a day wrestling with conflicting libraries? Tired of “works on my machine” chaos? Docker can rescue you. In the next 10 minutes, you’ll learn why containerization matters, see real-world examples, and walk step-by-step through dockerizing your first app—no prior Docker experience required.
Why Dockerize? Top Benefits in Plain English
- Reproducible environments – The same container runs on your laptop, CI server, and in production.
- Dependency isolation – Your Python app’s requirements never collide with your Node.js microservice.
- Simplified deployment – Build once, run anywhere: local machine, Kubernetes, or cloud.
- Accelerated onboarding – New team members run
docker pull && docker runand get up to speed immediately. - Resource efficiency – Containers share the host kernel, so they’re lighter than full VMs.
Real-World Use Cases
- Single-page web app (React, Vue) served via Nginx
- Polyglot microservices: Node API + Python worker + Redis cache
- Legacy monolith lift-and-shift: packaging an old Java WAR with its JDK
- CI job runners: standardized test/build environments in GitHub Actions or Jenkins
- Data-processing pipelines: ETL jobs and machine-learning workflows with pinned library versions
- Command-line tools: distribute CLIs as Docker images so users just
docker run yourtool
Prerequisites & Setup
- Install Docker
– Windows/Mac: Docker Desktop
– Linux: Docker Engine + Docker Compose - Familiarize yourself with basic commands:
docker build # build an image docker run # start a container docker ps # list running containers docker logs # fetch container logs - Create a simple scaffold: a “Hello, World” Node or Python app in a folder named
myapp/.
Step-by-Step Tutorial: Your First Dockerized App
- Write
index.jsconst http = require('http'); const port = 3000; const server = http.createServer((req, res) => { res.end('Hello, Docker World!'); }); server.listen(port, () => { console.log(`Server listening on http://localhost:${port}`); }); - Initialize dependencies
cd myapp npm init -y npm install express - Create a
DockerfileFROM node:18-alpine WORKDIR /app COPY package*.json ./ RUN npm install COPY . . EXPOSE 3000 CMD ["node", "index.js"] - Build your image
docker build -t myapp:latest . - Run the container
docker run -p 3000:3000 myapp:latest - Verify it works
Open your browser at http://localhost:3000 and you should see “Hello, Docker World!”
Pro tip: For live code reload during development, run with a bind mount:
docker run -v "$(pwd)":/app -w /app -p 3000:3000 node:18-alpine sh -c "npm install && node index.js"
Level-Up with Docker Compose
When you need multiple services (app + database + cache), Docker Compose keeps everything in one file:
version: '3.8'

services:
  web:
    build: .
    ports:
      - "3000:3000"
    depends_on:
      - db
    volumes:
      - .:/app

  db:
    image: postgres:15-alpine
    environment:
      POSTGRES_DB: mydb
      POSTGRES_USER: user
      POSTGRES_PASSWORD: pass

  cache:
    image: redis:7-alpine
Start all services:
docker-compose up --build
Stop & cleanup:
docker-compose down --volumes
Best Practices & Common Pitfalls
- Multi-stage builds to keep images lean.
- Pin base images (e.g.
node:18.17.1-alpine, notnode:latest). - Use
.dockerignoreto exclude unnecessary files. - Manage secrets via env vars or Docker secrets, never bake them in images.
- Clean up unused resources with
docker system prune --all --volumes. - Watch for file permission issues when mounting host volumes.
Gotcha: On macOS/Windows, bind mounts can be slow for large file trees—consider delegated mounts or run heavy I/O tasks inside the container.
Next Steps & Advanced Topics
- Orchestration: Kubernetes, Docker Swarm, or Nomad
- CI/CD Pipelines: Automate build-test-push with GitHub Actions or Jenkins
- Security Scanning: Integrate Trivy, Snyk, or Clair
- Automated Rollbacks: Leverage healthchecks and labels
- Image Distribution: Push to Docker Hub or a private registry
Wrap-Up & Call to Action
You’ve learned:
- Why Docker matters: consistent, isolated environments
- How to dockerize a simple app and multi-service stack
- Best practices to keep images lean, secure, and maintainable
- Next steps for orchestration, CI/CD, and security
Your challenge: Pick one of your existing projects—whether that React widget, Python ETL script, or legacy Java service—and give it a docker makeover today. Got stuck? Drop a link to your Dockerfile in the comments or join our Discord community for real-time help.
FAQ
How do I update code without rebuilding the image?
During development, mount your project folder into the container so it sees live file changes—for example:
docker run -v "$(pwd)":/app -w /app -p 3000:3000 myapp:latestThis way, edits you make locally are reflected immediately inside the container. For production deployments, though, it’s best practice to rebuild and redeploy the image to ensure everyone runs the exact same, tested version.
What if my container runs out of memory?
You can set memory limits when running or in your Compose file. For instance:
docker run --memory=512m myapp:latestIn Docker Compose, under deploy.resources.limits you might specify:
version: '3.8'
services:
  web:
    image: myapp:latest
    deploy:
      resources:
        limits:
          memory: 512M
Additionally, monitor usage with docker stats or tools like cAdvisor to understand and adjust your requirements.
Can I use Docker on Windows or macOS?
Absolutely. Docker Desktop provides a ready-to-use experience on both Windows and macOS by running a lightweight Linux VM behind the scenes. Just install Docker Desktop, open your terminal or PowerShell, and you’re using the same docker commands as on Linux.
How do I keep my images small?
- Use multi-stage builds: compile or build dependencies in one stage, then copy only the final artifacts into a minimal runtime image.
- Pin your base images to slim variants (e.g.,
node:18-alpineinstead ofnode:latest). - Leverage a
.dockerignorefile to exclude unnecessary files and folders from the build context.
Where can I learn more or get help?
Official Docker docs
Community forums & Discord Hands-on tutorials and sample repos: search GitHub for “docker getting started.”
This has the most common Docker Compose ports if you need them.