How to Run NordVPN in Docker (Step-by-Step Guide)
Get a NordVPN Account Here
Running NordVPN inside Docker is the cleanest way to protect specific apps, automate privacy, and keep your host system untouched. Instead of installing a VPN directly on your machine, you route only the containers you choose through a secure VPN tunnel.
This guide walks you through the recommended Docker setup used by power users, homelab builders, and anyone running tools like torrent clients, scrapers, or automation services.
Why Run NordVPN in Docker?
Using NordVPN inside Docker gives you several advantages:
- Route only selected containers through the VPN
- Avoid VPN conflicts with your host OS
- Easily start/stop VPN routing per app
- Ideal for servers, NAS devices, and headless systems
- Clean, repeatable, version-controlled setup
The best practice is to run NordVPN as its own container and let other containers share its network.
Prerequisites
Before you begin, make sure you have:
- Docker installed
- Docker Compose installed
- An active NordVPN account
- Your NordVPN username and password
This guide assumes a Linux-based Docker host (including NAS devices like Synology).
Get an Active NordVPN Account Here
The Recommended Architecture
Instead of installing NordVPN inside every app container, you will:
- Run NordVPN as a standalone container
- Attach other containers to its network
- Force all their traffic through the VPN tunnel
This creates a single, controllable VPN gateway.
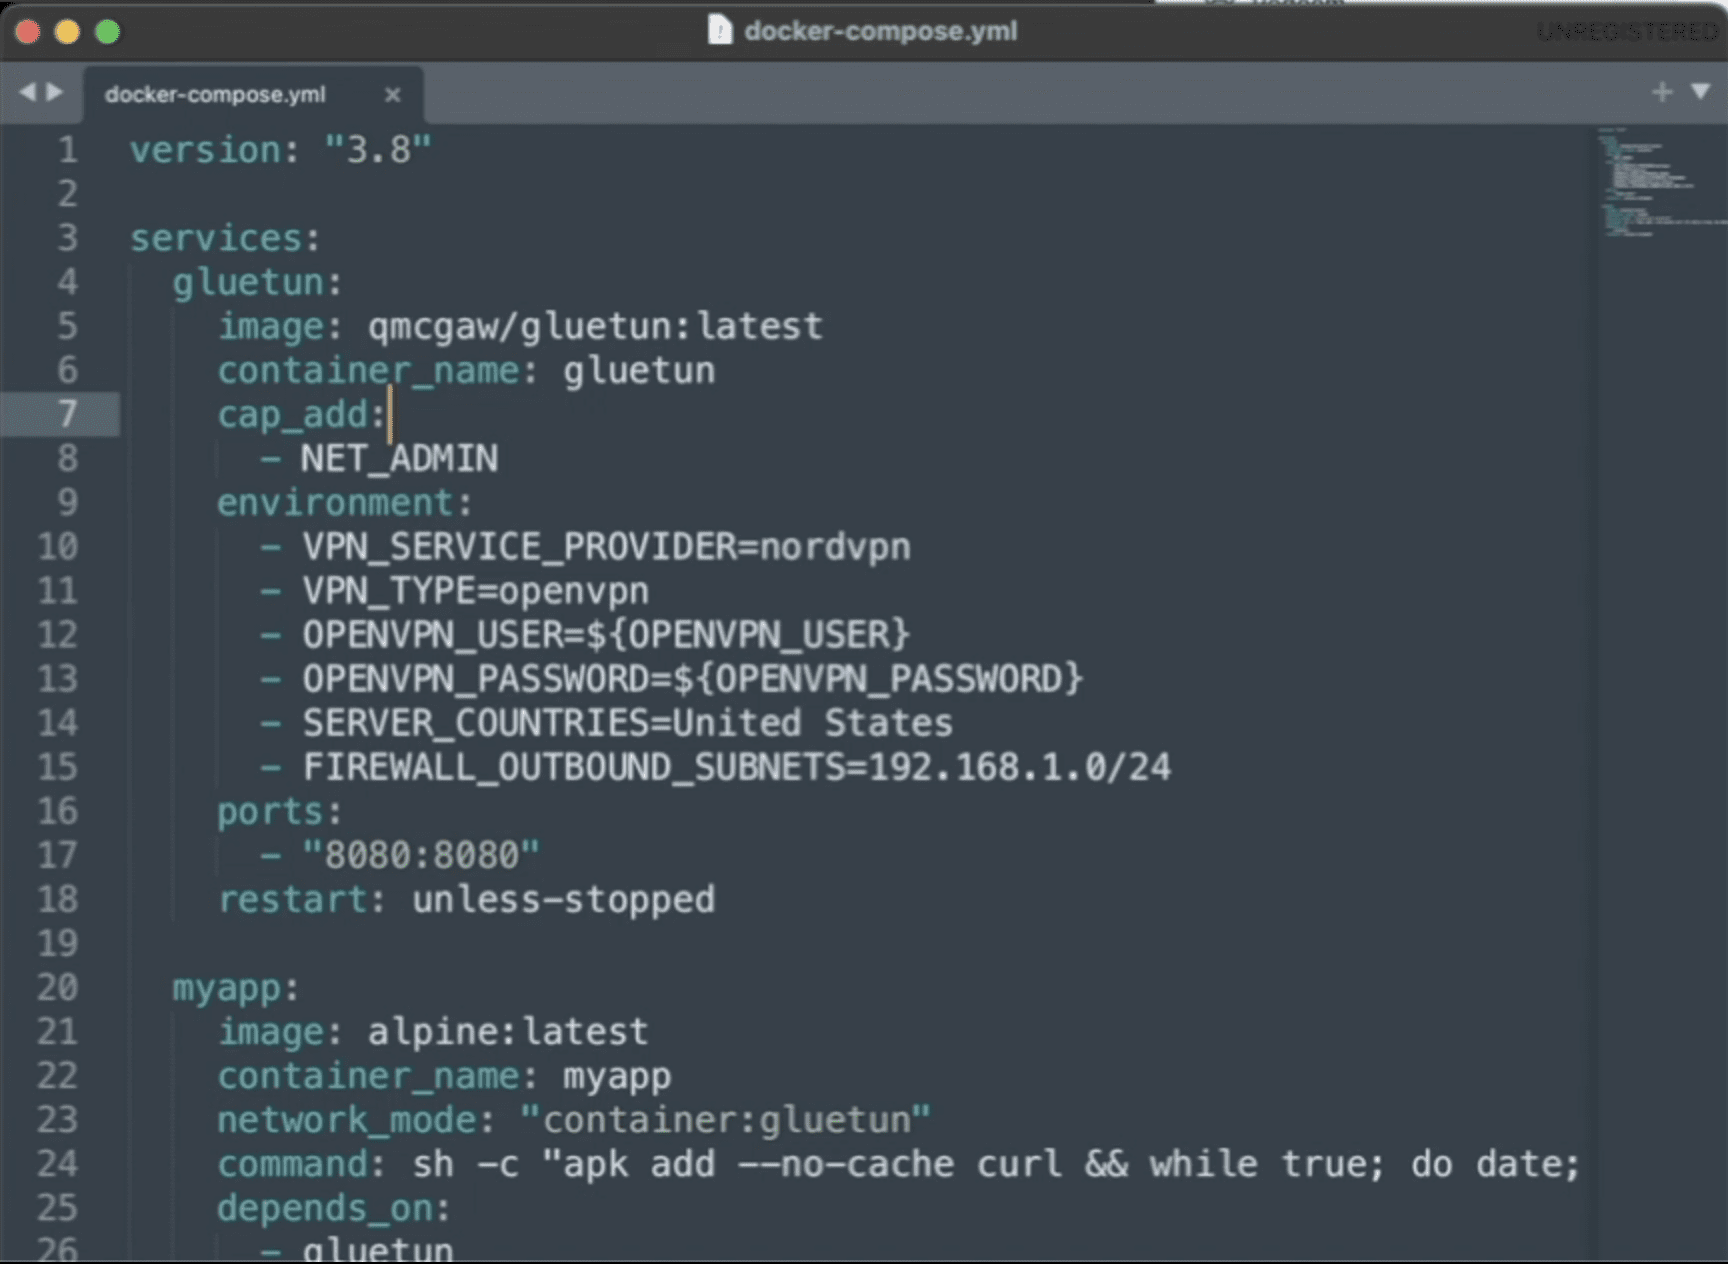
Step 1: Create Your Docker Compose File
Create a new folder and add a file named docker-compose.yml.
What This Does
-
Grants the container permission to create a VPN tunnel
-
Logs into NordVPN automatically
-
Connects to a U.S. server on startup
-
Disables IPv6 to prevent IP leaks
Step 2: Route Another Container Through NordVPN
To force an app to use the VPN, you attach it to the NordVPN container’s network namespace.
Here’s an example using qBittorrent:
Key Line Explained
This forces all traffic from the app container to pass through NordVPN.
Get an Active NordVPN Account Here
Step 3: Expose Ports Correctly (Critical Step)
When containers share a network like this, ports must be exposed on the VPN container, not the app container.
Update the NordVPN service:
Now you can access the app at:
Step 4: Start the Stack
From your project directory, run:
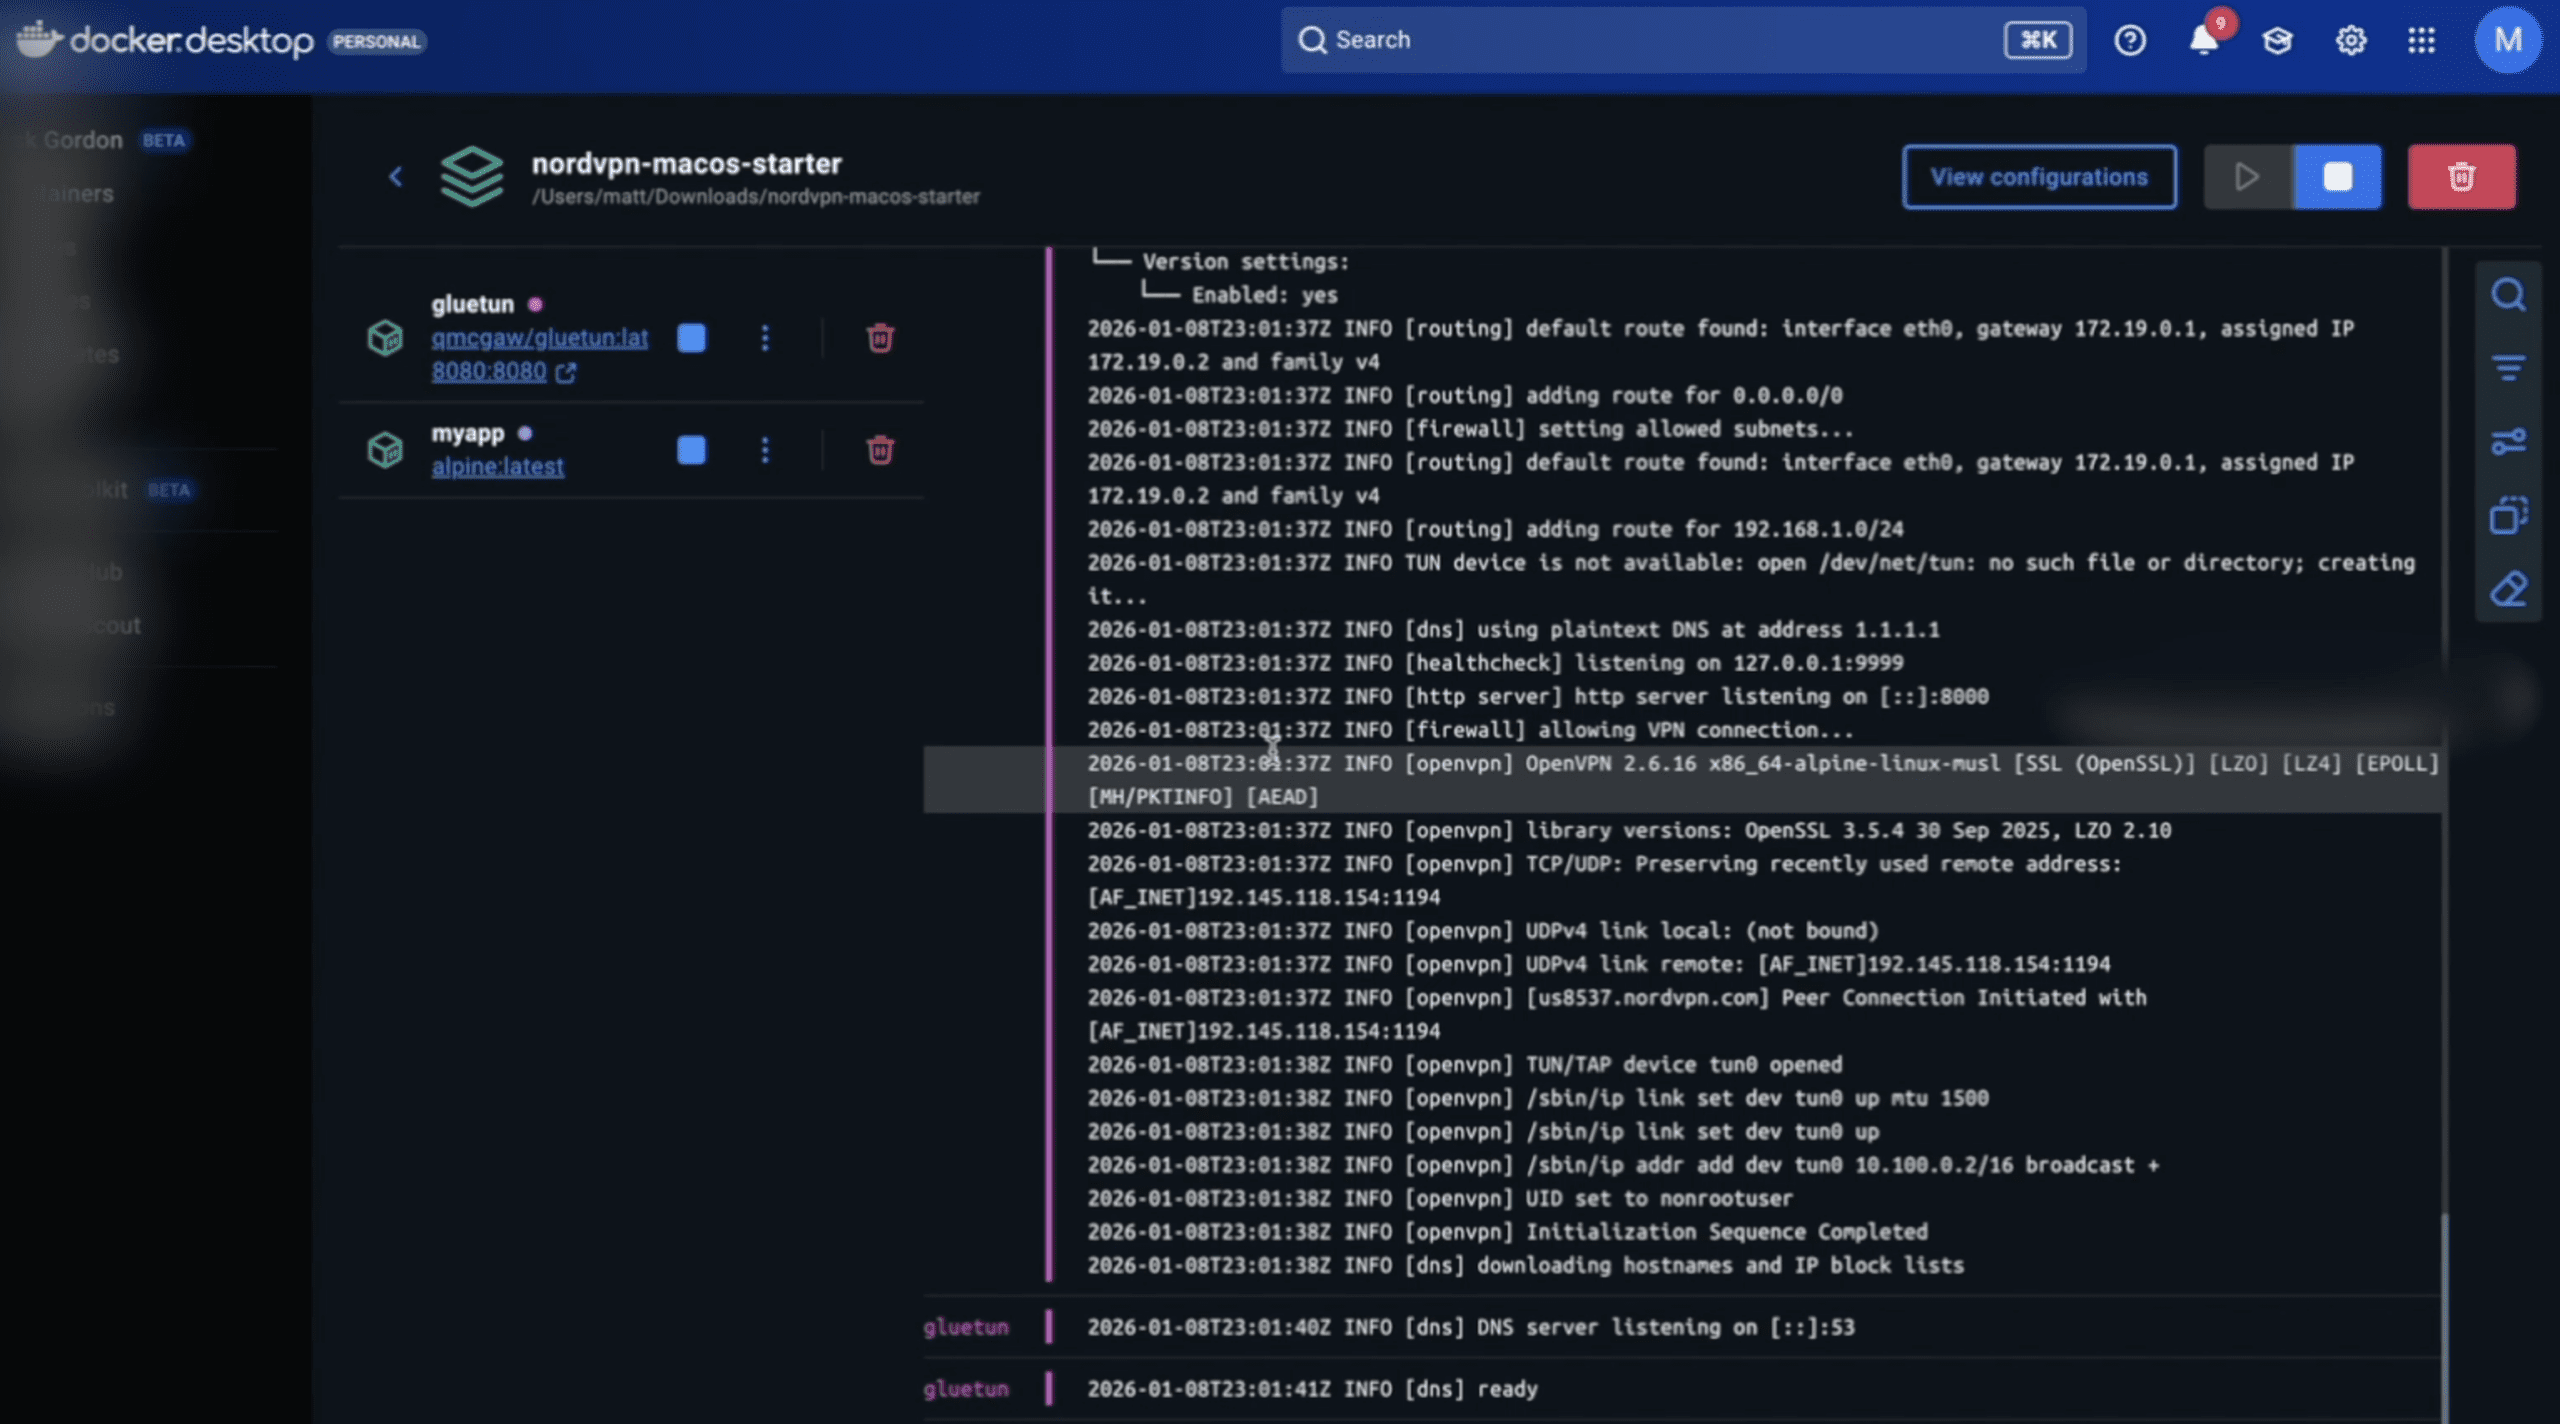
Check the VPN connection:
You should see NordVPN successfully authenticate and connect.
Step 5: Verify the VPN Is Working
Enter the VPN container:
Run:
The IP address returned should be a NordVPN IP, not your home IP.
Any container sharing the VPN network will use this same IP.
Step 6: Add More Containers to the VPN
To route additional services through NordVPN, simply add:
Expose any required ports on the NordVPN container.
Common Mistakes to Avoid
-
Publishing ports on the app container instead of the VPN container
-
Forgetting
NET_ADMINcapability -
Expecting inbound port forwarding (NordVPN does not support it)
-
Mixing VPN and non-VPN traffic in the same container
When to Use a Different VPN Container
If NordVPN authentication changes or you want more flexibility, many users switch to a general-purpose VPN container like Gluetun, which supports NordVPN and many other providers.
The routing concept stays exactly the same.
Final Thoughts
Running NordVPN in Docker is one of the cleanest ways to control privacy, security, and traffic routing in modern containerized setups. Once configured, it’s reliable, portable, and easy to extend.
If you’re running automation tools, scrapers, torrent clients, or server workloads, this setup gives you full control without compromising your host system.